
Decorating for Christmas doesn't need to be expensive or time-consuming. Make your own creative Christmas decorations using inexpensive materials you may even already have around the house. Each of the following projects is easy to make, can be done for next to nothing, and won't take up all of your holiday time.
Charming Christmas Coasters
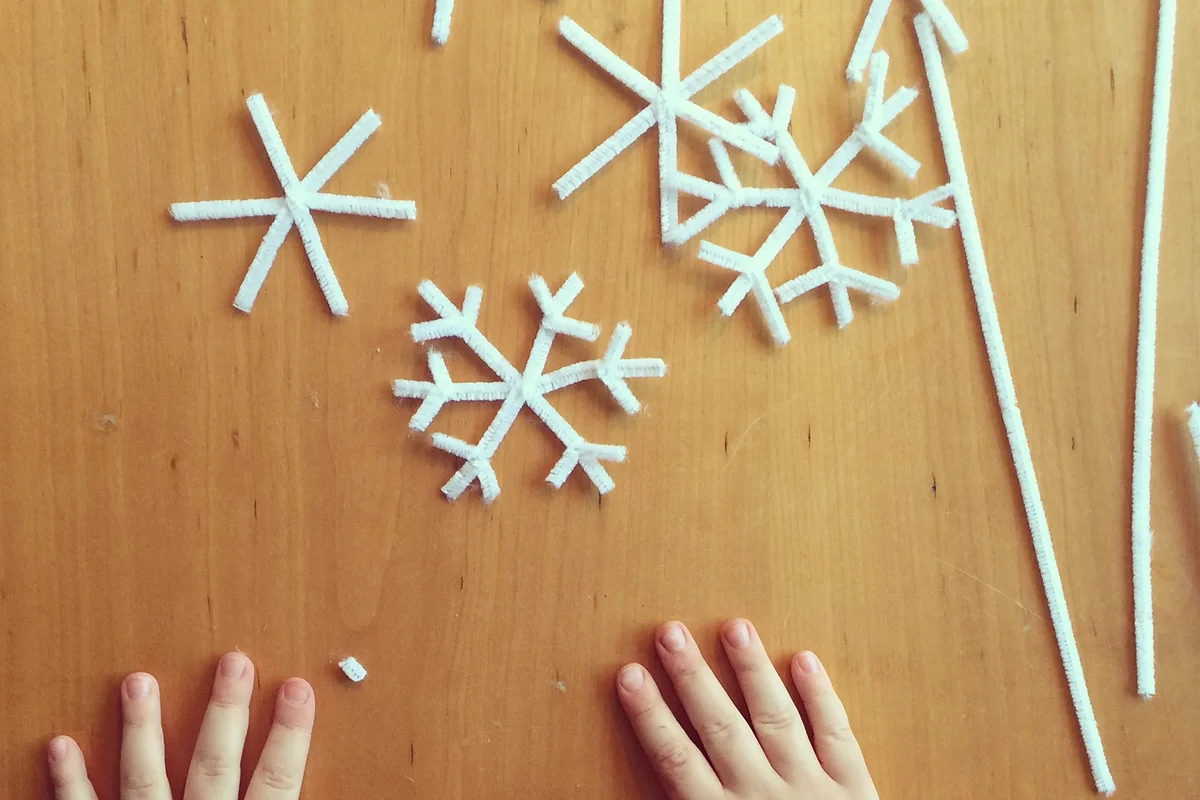
If you love to entertain over the holidays, create dainty snowflake coasters for your guests to set a festive winter cocktail on. Using a few inexpensive items, snowflake coasters are inexpensive to make and don't take much time at all. You can create a few for the home, or you can make many pipe cleaner snowflakes to adorn a string of garland.
Materials
- Hot glue gun and hot glue sticks
- White pipe cleaners
- Scissors
Directions (To make one snowflake)
- Cut three, 3-inch pieces of pipe cleaner.
- Cut six, 1-inch pieces of pipe cleaner.
- Cut six, 3/4 inch even pieces of pipe cleaner.
- Glue the three, 3-inch pieces of pipe cleaner in a star pattern.
- Bend the 1 inch and 3/4-inch pieces into "V" shapes.
- Glue the 3/4 inch "V" pieces onto the ends of the 3-inch pieces of pipe cleaner.
- Glue the 1-inch "V" pieces onto the ends of the 3-inch pieces of pipe cleaner.
- Vary where the smaller "V" pieces go, making each snowflake coaster unique.
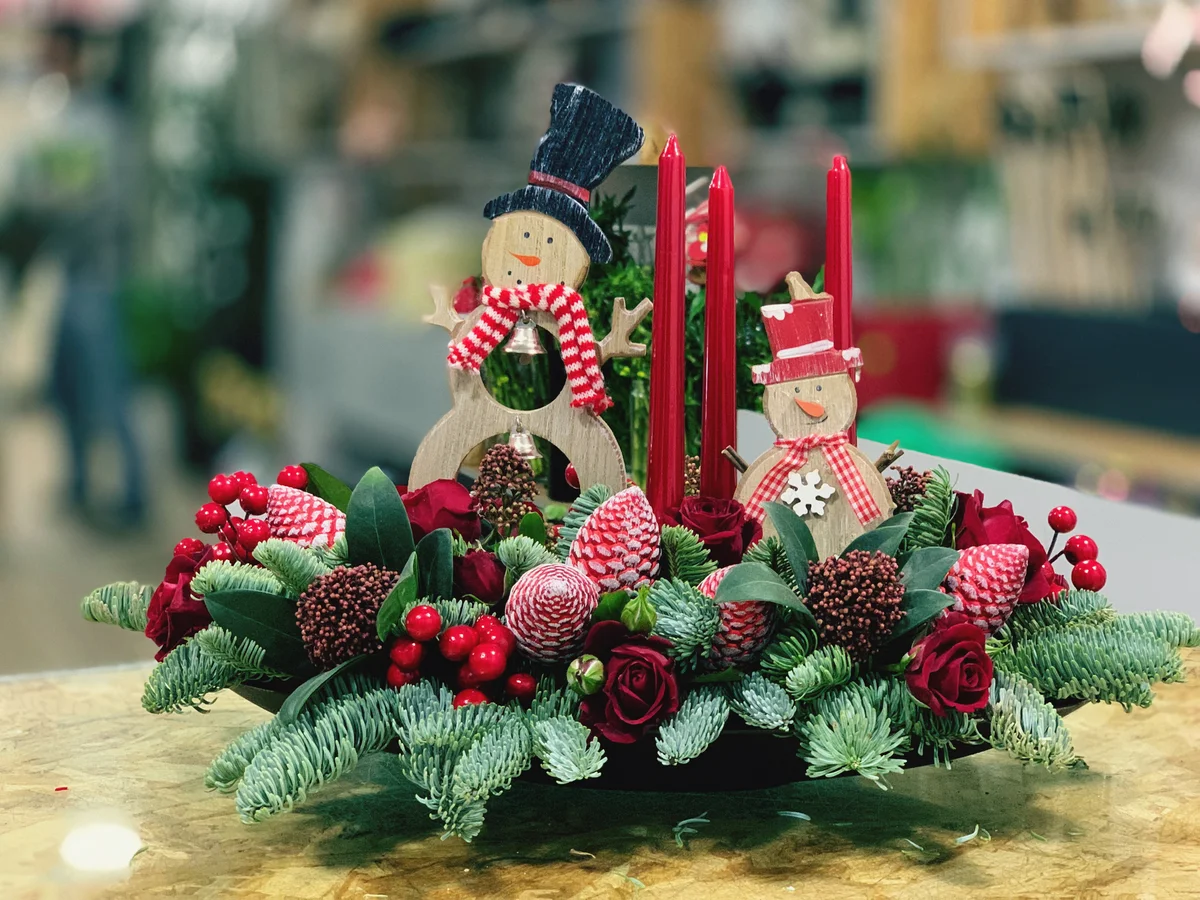
Make the Cutest Kissing Ball Ever

The adorable holiday kissing ball above is made of faux pine and berries, so it will remain evergreen and last forever as a creative spin on traditional mistletoe. No one will believe this craft was something that you made with your own two hands for mere dollars. All the items needed to create this craft are cheap, and most crafters have many of the materials on hand.
Materials
- 6-inch foam craft ball
- 42 inches of 1/2 inch ribbon
- Hot glue gun and glue sticks
- Faux berries and leaves
- Faux evergreen boughs
- Wire cutters
Directions
- Cut your ribbon to be 42 inches long.
- Glue the ribbon around the foam ball and secure it with glue. Fashion a loop from the ribbon and make sure the parts of the ribbon touching the ball are securely placed.
- Using wire cutters, cut the faux evergreen boughs to size.
- Place a dab of hot glue at the end of the cut evergreen branch and insert it into the foam ball.
- Cover the entire foam ball with evergreen branches.
- Glue faux berries and leaves to the evergreen ball.
- Cut a piece of ribbon and tie it into a pretty bow.
- Glue the bow where the ribbon bow meets the foam ball.
- Hang the kissing ball under any doorway in your home.
Pretty Pinecone Trees

Pinecones are great items to use in crafting, and pretty pinecone trees add the perfect rustic touch to any holiday space. They can be used on tablescapes, mantles, shelves, and just about anywhere else in need of a festive touch. Making these pinecone trees is easy and costs next to nothing.
Materials
- Pinecones (bought or found)
- Hot glue gun and glue sticks
- A base for your pinecone tree (several options at local craft stores, or slice off a 1-inch sliver from a thick tree branch)
- Gold or silver beads
- A small star for the treetop
- Gold or silver paint and paintbrush
Directions
- If you are using pinecones from the outdoors. Heat oven to 200 degrees.
- Line a baking sheet with foil. Place pinecones on the baking sheet.
- Heat the pinecones in the oven for 60 to 90 minutes to rid them of possible pests.
- Using your hot glue gun and glue, place a small dab of glue on the top side of a pine needle.
- Place a bead onto the dab of glue.
- Continue steps 4-5 on several of the pinecone needles, but not all of them.
- Put a good coating of glue on the bottom of the pinecone.
- Connect the chosen base to the glue.
- Paint your star and let dry.
- Glue the star to the top of the pinecone.
Fashion a Fence Picket Snowman
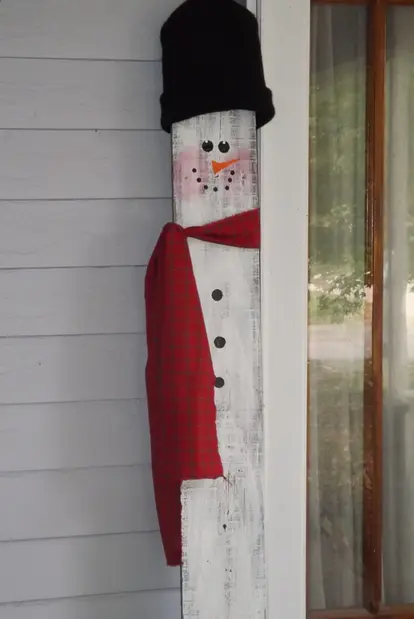
Standing sentry at your front door, Mr. Frosty is ready to play or greet friends and family. This snowman craft can be created using a recycled fence picket or a new fence picket, which costs less than $2. Most items needs for decor can be found around your home. You may already have an old stocking cap and scarf, but if you need to purchase one, check thrift stores or dollar stores for the best price. The only other items you need are paints, a paintbrush, and a few small, cheap items.
The estimated cost of this project is less than $5, or much less if you are using recycled materials. He can be completed in an afternoon, and most of that time is drying time that will allow you to do other things while waiting. Being so adorable and cheap to create, consider making several snowmen for family and friends.
Materials
- 5 1/2-inch-wide by 6-feet-tall fence picket
- Craft paints in white, black, red, and orange
- Paintbrushes - 2-inch wall brush, artist brush, and stencil brush
- Paper plate
- 3/4-inch wood dowel scrap
- 1/4-inch wood dowel scrap
- Wood skewer
- Stocking cap
- 1/6-yard plaid cotton fabric, 44-inch-wide
- Scissors
- Craft glue (optional)
Directions
- Dry brush white craft paint to one side of a five 1/2-inch-wide fence picket. Allow the paint to dry.
- Place a stocking cap over the top of the picket. If the cap is loose, or you would prefer a more permanent hold, apply craft glue under the edge of the cap to secure.
- Rip a 6-inch-wide by a 44-inch-wide strip of plaid cotton fabric. Tie the strip around the picket 6 inches below the cap. The space between the cap and the scarf is the face of the snowman. Note: An old winter scarf can be substituted for the fabric strip.
- If you are working on the snowman with the picket standing upright, lay it flat at this time. Dip a stencil brush into red craft paint. Pounce and brush the bristles onto a paper plate until most of the paint has been worked off. Pounce two large cheeks in the center of the snowman's face.
- Dip the end of a 3/4-inch wood dowel scrap in black craft paint. Dot two eyes 2 inches below the cap edge and spaced 1/2 inch apart.
- Dip the end of a 1/4-inch wood dowel scrap in black craft paint. Dot seven dots to form a smile from one cheek to the other.
- Paint a 2-inch triangle carrot nose using orange craft paint and an artist brush.
- Dip the 3/4-inch dowel in black paint and dot three buttons down the front of the snowman. Place the first button three inches below the scarf and space the remaining buttons approximately 2 inches apart. Allow the paint to dry.
- Dip the blunt end of a wood skewer in white paint. Dot highlights at the top edge of each eye. Allow the paint to dry before standing the snowman upright again.
Tis the Season for Crafting
Holidays like Christmas bring out the inner-crafter in many people. The season gets people in the mood to sew, bake, and create. Remember that crafting and creating over the holidays is supposed to be enjoyable. If you have a Christmas craft in mind that seems like it will take a week to complete and cost an entire paycheck, then look around for a less time-consuming and less expensive craft to take on. The holiday season is short, and purchasing presents for loved ones is pricey. Don't waste time and money on intensive crafts when these adorable ones can be simply made for less.