
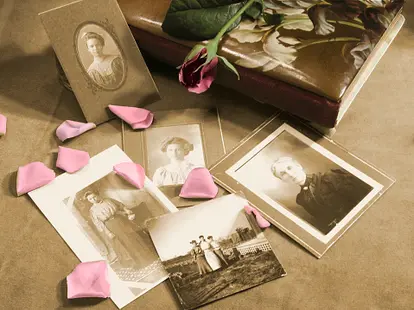
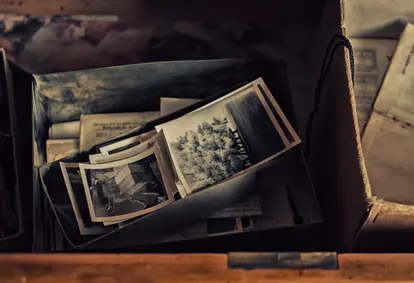
If you have a box of unlabeled photographs in your basement or attic, you aren't alone. Most families pass down photos that aren't labeled, and it takes a hard heart to throw away these little mysteries. Fortunately, the pictures themselves may offer clues about the time in which they were taken, as well as give you a starting point for solving your genealogical questions.
Identify the Photographic Technique
A quick glance at your box of images will tell you all photographic techniques are not the same. You'll notice different sizes of pictures, colors of printing, and textures of paper. Several photographic techniques were popular in the 19th and 20th centuries and knowing how your photo was made will help you figure out an approximate date for when the photo was taken.
Examine your photograph to determine which type it is. It's handy to own a magnifying glass and a measuring tape for this part of the identification process. It also helps to have examples of each popular technique.
Daguerreotype
This was the first type of popular photography, especially during the 1840s and 1850s. These images were usually displayed in a small, hinged case and had a metal backing. They often had a protective panel of glass in front of the image since the surface of the print was delicate. While some examples are larger, most daguerreotypes were small, typically two and a half by three and a quarter inches.
When looking at the photo to decide if it's a daguerreotype, turn it from side to side in the light. Skinner, Inc. notes that if it is a daguerreotype, the image itself will possess a reflective quality similar to a hologram or even a mirror.
Ambrotype
Similar in size and format to a daguerreotype, an ambrotype is developed on glass instead of metal. Skinner, Inc. reports ambrotypes also have lower contrast between the light and dark parts of the image. Ambrotypes were kept in small cases similar to a daguerreotype, but they don't feature the same reflective property. They came in several sizes, many ranging from 3 1/4 by 4 1/4 inches to 2 by 2 1/2 inches.
According to Photo Tree, an ambrotype is easy to date because the technology was only popular for about a decade - from 1855 to 1865. Within this time frame, there are other clues to help refine the date. For instance, ambrotypes from 1855 to 1857 may feature an image printed between two pieces of glass. After 1858, they were nearly always on a single piece of glass. Additionally, more ornate cases indicate images from the latter portion of the ambrotype period.
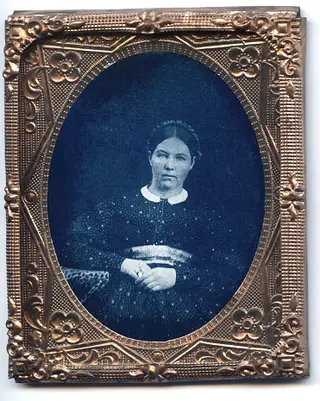
Tintype
Similar to the daguerreotype in that it had a metal backing, the tintype was popular from the time they were invented in 1854 throughout the last half of the 19th century. These images were made in varying sizes, but the most popular was about 2 1/2 by 3 1/2 inches. Many came in hinged cases.
According to Family Tree Magazine, the easiest way to determine whether you have a tintype is to see if a magnet is attracted to the metal. Tintypes are duller and lower contrast than daguerreotypes, and they don't have the characteristic reflective surface. The image surface also sometimes shows some flaking with some loss of details.
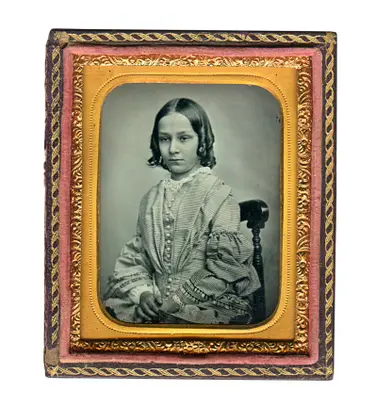
Carte-de-Viste or Cabinet Card
This type of cardboard-backed photo was made in a standard size to accommodate photo albums, so most were 2 by 3 1/2 inches, mounted on a slightly larger cardboard backing. A larger version of the same process, the cabinet card usually measured about 6 1/2 by 4 inches. According to the UK's Science and Media Museum, these images were extremely popular from the late 1850s through the early 1900s, due to the ability to make several copies of the same image.
The back of the photo usually displayed the photographer's name and location, which can be very helpful for identifying the photo. Additionally, the thickness of the cardboard offers another clue, with thinner cardboard indicating an older image. If the cardboard mount has rounded corners instead of square, it indicates the image was made after 1870.
Photo Postcard
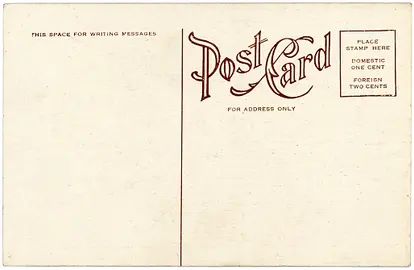
The photo postcard was very popular in the early 1900s. This postcard-sized photo was printed with postcard markings on the back. According to Family Tree Magazine, this type of printing was an option at many portrait studios around the turn of the century. The earliest examples display a small area on the front of the postcard for the sender to write a message, however, most feature the traditional split back for the address and message.
Photo postcards can be an especially valuable resource for genealogists. They may feature a message from the sender and even an address. Sometimes, you can use a magnifying glass to make out a faint postmark date on the back of these photos too.
Early Home Photo
The Met reports the first Kodak consumer camera, issued in 1888, revolutionized the world of photography and allowed people to take photography into their own hands. Within ten years, 1.5 million cameras were in the hands of amateur photographers, resulting in millions of family snapshots. The popularity continued to rise as camera technology changed and it became easier for regular people to take images.
Early home photos came in a wide variety of sizes. Most have a snapshot-like quality, as opposed to the standard posed images from portrait studios. They are typically printed on thin paper, and it's common to see issues with focus and exposure. If you have early home photos, you know they are from 1888 or later.
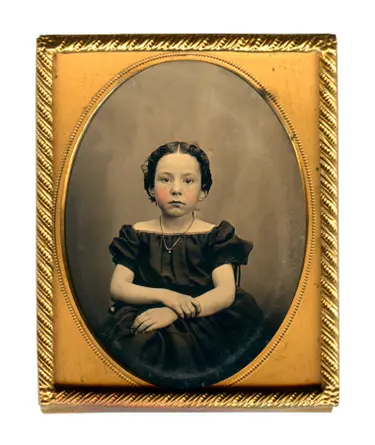
Women's Clothing
There was a great deal of change in women's clothing styles throughout the late 19th and early 20th centuries, which makes it a great clue for dating photos. While men's clothing and children's styles changed over the years, women's clothing shows the most dramatic changes. Here's a general sense of how the styles changed through the decades:
- 1850s and 1860s - Very wide, bell-shaped dresses with a simple neckline and simple hairstyle
- 1870s - Long skirt with little or no draping, a high collar, and slim-fitting sleeves
- 1880s - Dresses with elaborate draping, a bustle back, and a straight front, along with long, slim sleeves
- 1890s - Dresses with high, full sleeves, high collars, and straight skirts with bustles
- 1900 to 1910 - Gently puffed sleeves, loose fitting, light-colored blouses, and narrow dark skirts or all-white dresses
- 1910s - Ankle-length skirts or dresses and simple, straight bodices or blouses
- 1920s - Straight silhouettes with tea-length skirts with appliqués and embellishments
Technology, Furniture and Vehicles
It's also a good idea to look at the vehicles and other items that are in the background of the photograph. This is especially helpful with early home photographs, since they often show vehicles, farm implements, furniture and other helpful items. Use your magnifying glass to examine these items closely.
- If you can identify the make and model of the car in the picture, it will help you pinpoint the period for the photo. The Antique Automobile Club of America has lots of photos of old cars and helpful forums where you can post photos and questions.
- Furniture styles can also help you date a photograph. If there is a piece of furniture in the image, use your magnifying glass to examine it. Identifying antique furniture can be rather a complicated process, but if you have the actual piece in your possession as a family heirloom, that can help.
- Decorating styles can offer another clue. Take a look at the surroundings and see if they match any of the common periods in interior design, including Art Deco and Victorian.
- Technology, such as telephones on the wall behind the subject of the photo, can also help you pinpoint a date. Resources like Telephone Archive can help you match the phone in the picture to one that was manufactured during a specific era.
- Look for old radios as well. You can get clues from the image to help you identify an antique radio, and then you can use that information to date the photo.
Putting the Puzzle Together
Now that you know how to figure out the age of a photograph, you can use the rest of your genealogy information to identify the subjects and the place. Your family history research will show you which family members were living at that time, and you can approximate the ages of the children to help in your photo labeling. Good luck!