
Jellyfish are eerily beautiful creatures, and they can be the visual inspiration for costumes for all ages. Great for Halloween, a school pageant, a parade, or a play, jellyfish costumes are something everyone can craft at home. Don't stress if you're not into serious sewing; you can totally make this easy outfit.
DIY Jellyfish Costume Tutu Dress
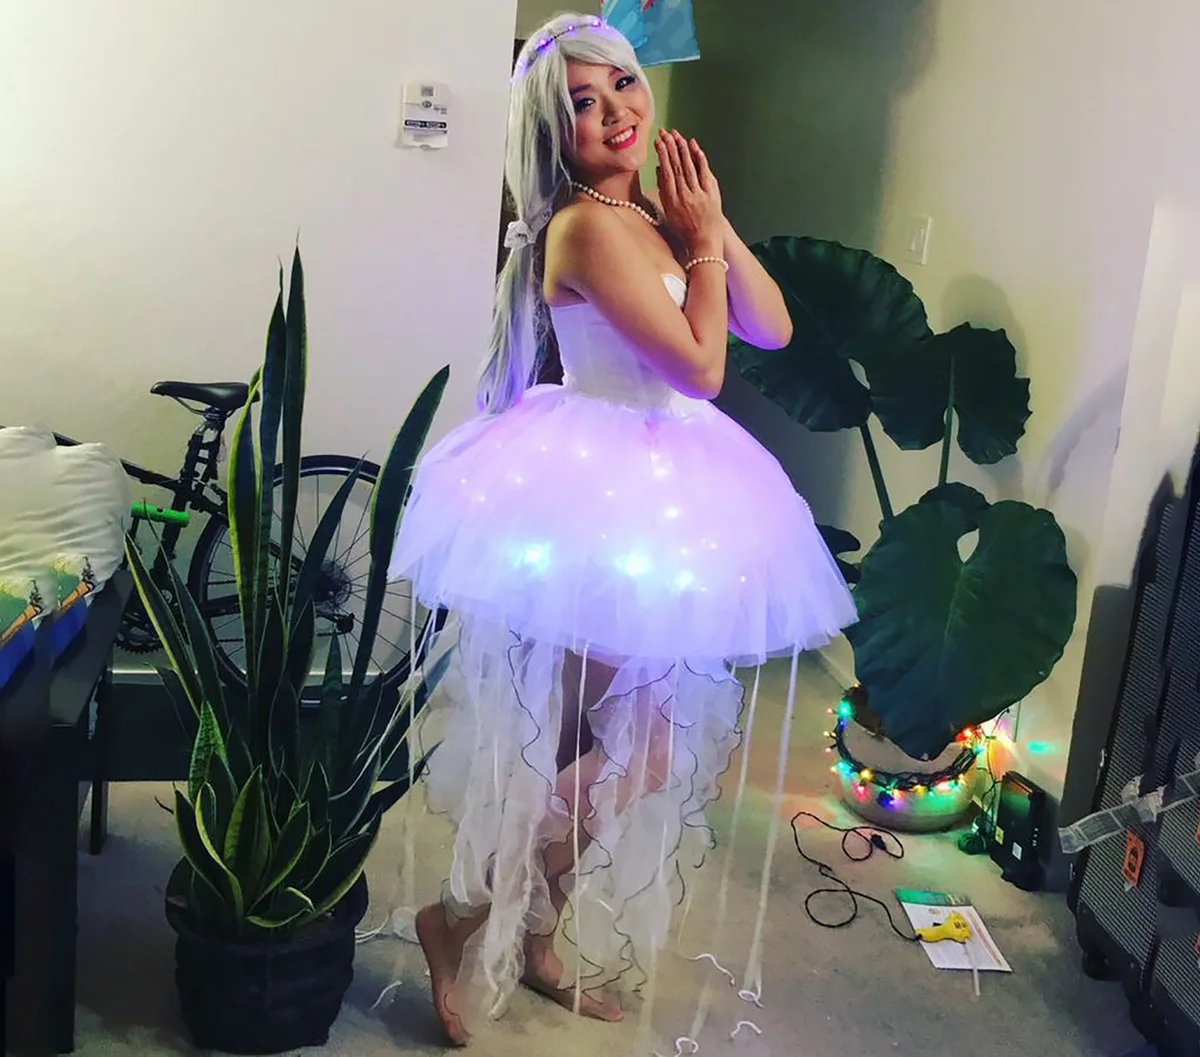
This elegant dress with a jellyfish tutu is a fun DIY costume project to undertake. It's modeled after the stunning light-up dress that was created by Instagram user April He. It incorporates purchased items, some crafting, and even involves the use of some fun lights. For this costume to be safe for the wearer, the lights purchased must be LED lights so they don't heat up and burn the wearer or the fabric of the tutu. These instructions are for an adult-sized costume but can be modified for a child by measuring and making the tutus and the tentacles shorter.
Gather the Supplies
- LED lights in pink and white
- Safety pins
- Erasable marking pen
- A needle and white thread
- A white corset top or a white tank top
- Faux pearl necklace
- Faux pearl bracelet
- Long silver wig
- One 25-yard roll of six-inch wide tulle in white
- Roll of elastic
- Two DIY tutus (one short, one long) or one short white tutu and one long white tutu
Assemble the DIY Tutus (Optional)
If you're making the tutus instead of buying them, use the supplies listed with the no-sew tutu tutorial and instructions.
- The short tutu should have strips of tulle cut to 18 inches long.
- The long tutu should have strips of tulle cut to 38 inches long.
- Follow all other instructions as outlined in the tutorial for each tutu.
Make and Attach the Tendrils
- Cut six 60-inch-long strips of tulle. Using some straight pins or a temporary marking pen, mark the strips lengthwise into thirds with each third approximately two inches wide (if using the six-inch wide tulle).
- Using a very long piece of doubled thread (knotted at the end) and a needle, hand stitch one line of evenly spaced, ¼-inch long stitches all the way along the dividing line on the tulle. Then sew a second, parallel line ¼-inch away from the first toward the outer edge of the tulle. It's best if this is done with one continuous piece of thread, but it is possible to do it in shorter sections if the thread comes up short. If this happens, make several tight, overlapping knots, and then begin again.
- Once the end of the strip has been reached, do not tie the end of the thread off and leave several inches of thread hanging off the end.
- This can also be done on a sewing machine instead of by hand. In that case, sew only one row up along the dividing lines of the tulle strip, making sure that the stitch length is as long as it can be (this is called basting). Knot one end, but leave the other end with loose thread several inches long.
- Hold the loose threads from both nearby pairs of stitched rows in one hand and, with the other hand, begin pushing the fabric up toward the knotted ends, making it bunch up (this is called gathering). Spread the gathering evenly along the length of the tendrils, working slowly and carefully.
- Gathering will cause the length of the tendrils to get shorter. Once they're the right length for the wearer, tie a few tight, overlapping knots (making one large lump of a knot is best) in the loose thread ends and then cut the long threads off so they no longer hang loose from the tendrils.
- Repeat this gathering method on both stitched lines on all the tendrils.
- Cut two 42-inch long strips of tulle. Cut each strip lengthwise into three long, straight, narrow strips.
- Put on the short tutu.
- Pin the top of one of the gathered tendrils to the waistband, and then space the remaining five gathered tendrils evenly, pinning them as you go. Carefully remove the tutu and then sew each tendril in place.
- Put on the long one.
- Pin the top of one of the straight-edged, narrow strips to the waistband. Pin on the rest of the straight tendrils, spacing them evenly. Remove the skirt carefully and then sew those tendrils in place.
Quick Tip
We like using extra long stitches (on the sewing machine or by hand) to make it easier to gather. Don't pull too hard on the threads as you're gathering, though. If the threads break, you usually need to start over to sew a new line of basting.
Attach the Lights
- Put on the short tutu.
- Cut four strips of elastic several inches longer than the length of the battery pack.
- Arrange two of the elastic strips in the shape of a plus sign or cross and stitch at the center where they intersect. Make two of these crosses total.
- Use the elastic crosses as a sling for the battery pack; sew all four edges to the waistband or tulle strips of the short tutu (these will be hidden by the longer tutu) at the back of the skirt. Place the second sling next to the first so both are at the back.
- Slide the battery packs into the cross-shaped slings. These should fit the battery packs snugly so they don't slip out of place. Adjust them if needed.
- Start with the pink lights and drape them so they make a wavy pattern, safety pinning them carefully in place so the pattern is spread out evenly around the waistband.
- At one spot on the elastic waistband, sew around the outside of the wires, making loops of thread that hold the wire in place.
- Tie the thread off after sewing one point in place. Do not link all of these together with one length of thread or the elastic waistband won't stretch properly.
- Sew each of the spots in place at the waistband, tying and cutting each individually.
- Repeat these steps with the white lights, placing these waves in between the pink waves so that the colors alternate.
Need to Know
Never pierce the wires of the LED lights with the sewing needle or safety pin; only fasten them in place over the top of the wires.
Put the Costume Together
- Wear the long silver wig and tie a low ponytail in it with a piece of white tulle.
- Put on the white corset top or tank top.
- Pull on the longer tutu first.
- Then, wear the short tutu under it.
- Arrange all the wavy and narrow tendrils in place.
- Put on the pearl necklace and bracelet.
Quick Tip
We know it's hard to wait, but resist the urge to turn the lights on until arriving at the event. This way, the batteries won't run out early.
Jellyfish Hat With Tendrils
This jellyfish-inspired hat is a great starting point for a costume for infants, children, teens, and adults. You can crochet or knit the hat itself at home or you can easily purchase one. A color-coordinated outfit to go with the aquatic theme completes this DIY jellyfish costume.

Supplies
- A crocheted or knitted cap in purple, blue, grey, or pink
- Two black buttons
- Three spools of sheer ribbon in coordinating colors, (blue, teal, white, sea foam, lilac, purple, silver, etc.)
- Rick rack in coordinating colors
- A needle and thread in coordinating colors
- Scissors
- A bodysuit or dress in a coordinating color or clothes from the closet
Directions
- Optional: Knit or crochet the cap.
- Sew two black buttons onto the front to represent the eyes.
- Put on the hat and measure from one temple, across the forehead, to the other temple. Mark this with pins, safety pins, or a small dot with a marker on the inside of the hat.
- Take the hat off.
- Cut lengths of the ribbon. 16 to 20 strips is a good start — it's easy to add more after those if a fuller look is desired. Cut 10 to 12 pieces of rick rack so they come to the waist or knees of the wearer.
- Sew strips of the ribbon all around the base of the hat, leaving the space between the markings blank (so that there aren't tendrils obscuring the wearer's vision when they later wear the hat).
- Add the lengths of the rick rack spaced out around the sides and back of the hat.
- To complete the look, wear the coordinating outfit, dress, or bodysuit underneath and don the jellyfish hat with the black button eyes facing front.
Make Your Jellyfish Costume Your Own
It's easy to emulate one of the elegant, vibrant angels of the sea with either of these DIY jellyfish costumes using readily available craft supplies and fabrics. Experiment with different color combinations for the ultimate custom jellyfish costume.