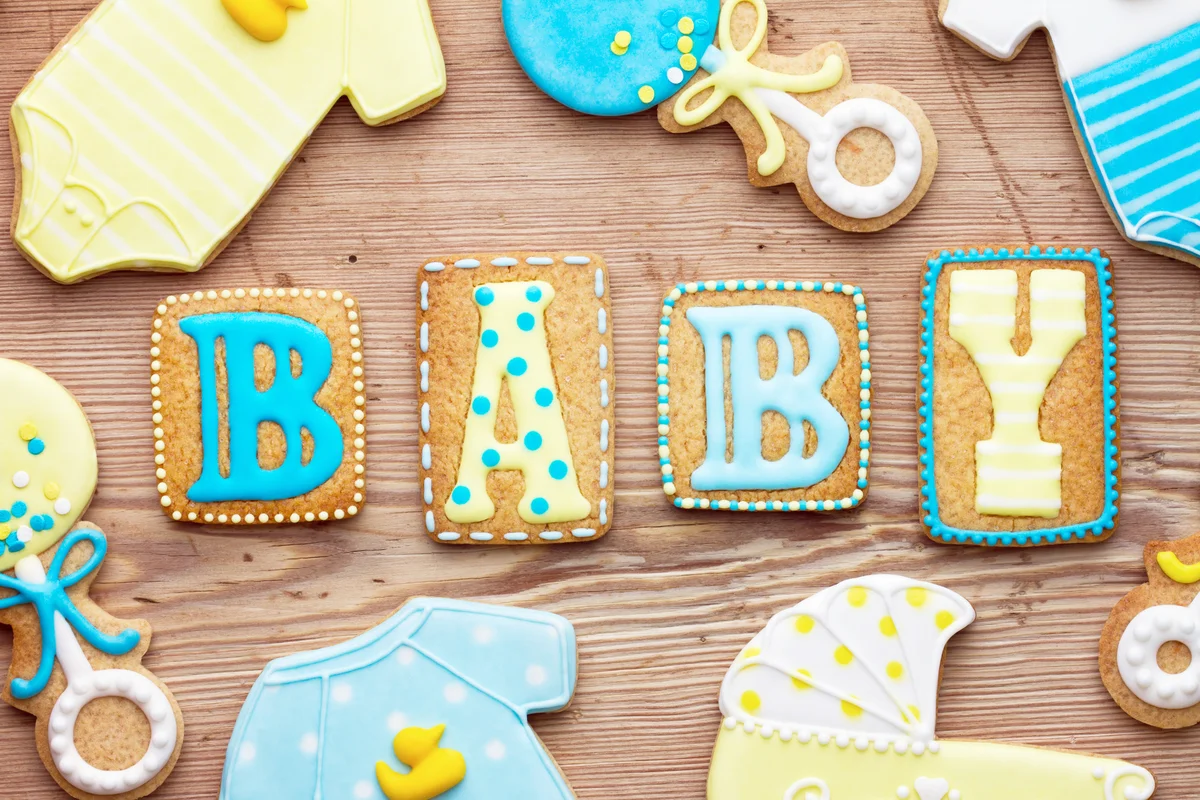
You can buy centerpieces at almost any store, but creative homemade decorations feel more personal. Take inspiration from your decorations, theme, or common baby items to create an eye-catching centerpiece on every table.
Baby Bottle Photo Holders
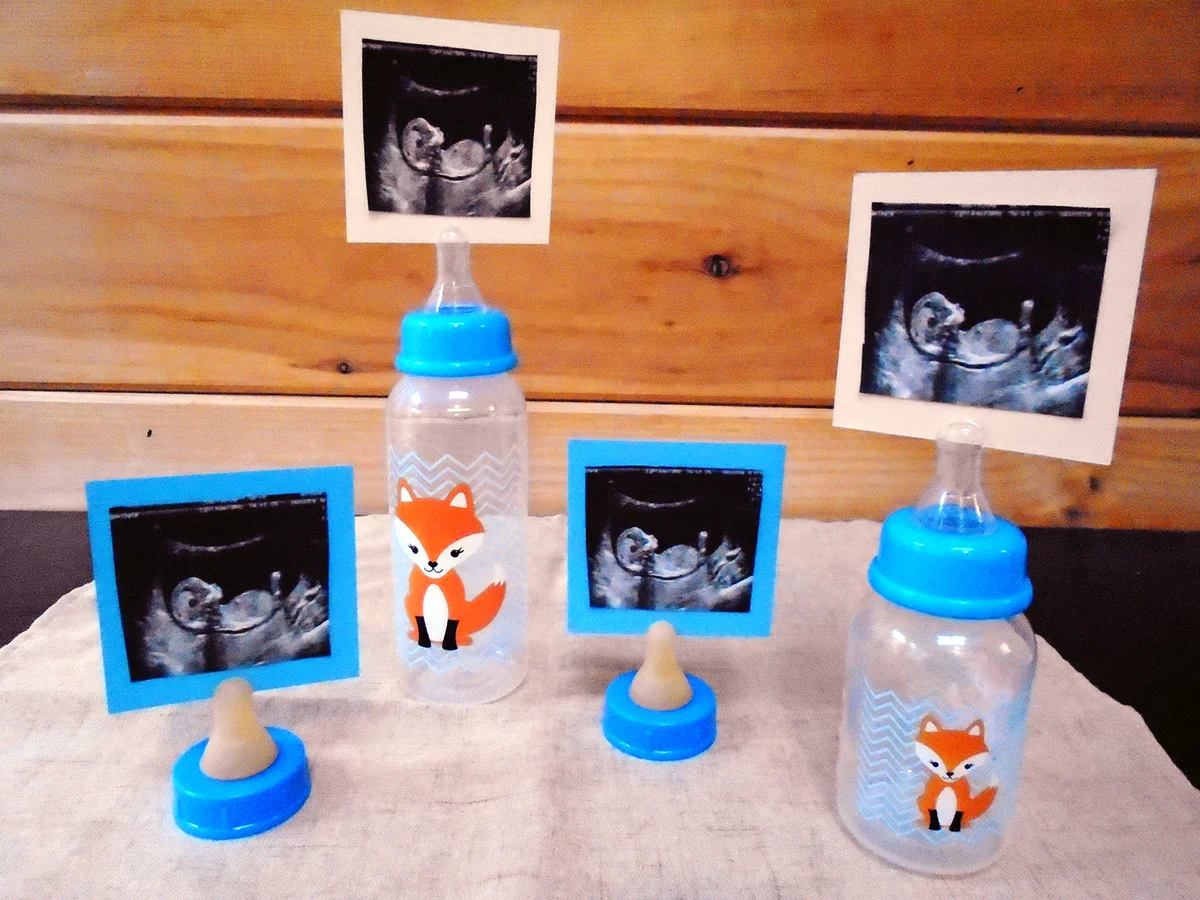
There's no better centerpiece than one that can be reused later by the new parents. This quick and easy centerpiece involves bottles and pictures, both of which parents can use again. Since you'll be cutting the nipples, provide some new ones to the parents after the shower so they can reuse the bottles.
What You Need
- Two baby bottles with nipples, any size
- Two spare baby bottle nipples with rims
- Four 3 x 3 squares of cardstock
- Sonogram pictures
- A photocopier
- Scissors
- Glue stick
Directions
- Make four or eight (if you want to make them double-sided) copies of the sonogram pictures.
- Cut each copy into a 2.5 x 2.5-inch square.
- Glue one photo to the center of one side of a piece of cardstock. If making double-sided pictures, glue one photo to the other side too.
- Remove nipples from rims. Cut a small slit at the top of each nipple about a quarter of an inch deep.
- Replace all nipples in rims and on top of bottles.
- Set each piece of cardstock into the slit of one nipple.
- Arrange the photo holders in the center of the table.
If you don't have sonogram pictures you can use baby pictures of the new mom and dad or write baby's name using one letter on each piece of cardstock. Add visual interest by filling the bottles with colored water, baby formula, or another fun filler.
Baby Washcloth Floral Arrangement
Baby food jars are the perfect vessel to hold all kinds of great shower decorations. Make the most adorable baby bouquets using baby washcloths so you won't have to spend a lot on real flowers.
What You Need
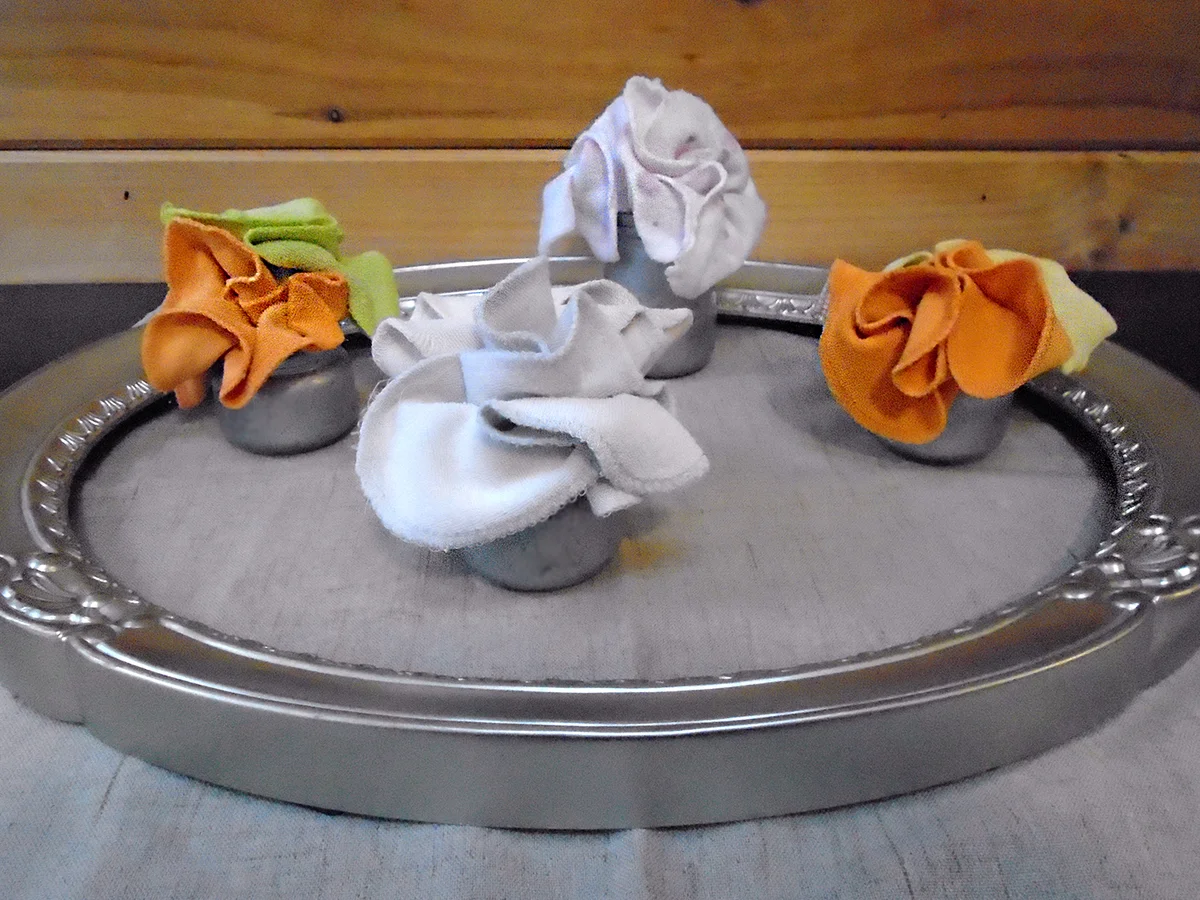
- Four baby food jars, any size
- Eight baby washcloths, tags removed
- Metallic acrylic paint
- Small, round sponge brush
- Decorative picture frame, glass and backing removed
Directions
- Clean the baby food jars and peel off as much of the label as you can.
- Using the sponge brush, dot paint all around outside the jar. It's okay for it to look splotchy, that gives it an antique feel.
- Once the jars are dry, start assembling the washcloth flowers.
- Lay the washcloth out flat, bright side down. Pinch the center of the washcloth and pick it up using two fingers. Form a circle with your thumb and pointer finger to slide over the end you have pinched until you are about 2/3 of the way up the washcloth. Turn your hand right-side up like you're holding a cup so the "flower" is facing you.
- Gently set the "flower" inside a jar.
- Repeat steps 4 and 5 until all jars have two "flowers" in them.
- Once the flowers are in the jars you can make adjustments to each "flower" to make it look great.
- Lay the picture frame in the center of the table.
- Place each floral arrangement inside the picture frame on the table.
Choose any color scheme you like and feel free to add more jars for a fuller look. For more elegant showers, add LED tea light candles inside each baby food jar. Personalize the display further by stenciling baby's name or initials onto one side of the jars.
Children's Book Banner
Celebrate classic children's books and the new little one with an easy book banner that can span a long section of large tables.
What You Need
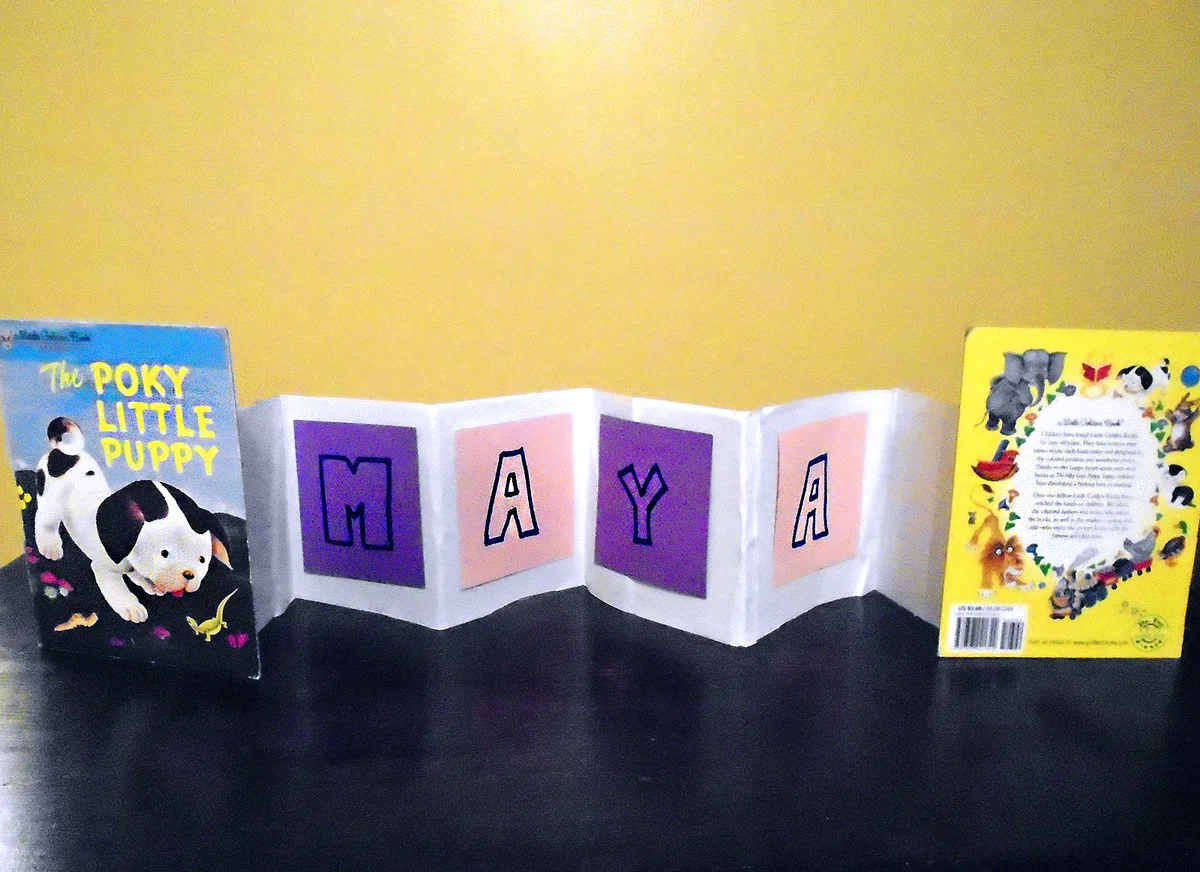
- A children's book, front and back cover removed
- A cereal box
- Construction or scrapbook paper
- Squares of 4 x 4 cardstock
- Scissors
- Packing tape
- Glue stick or hot glue
- Marker or pre-cut letters no bigger than 3 inches tall
Directions
- Pull open both ends of the cereal box so you can see through the whole thing like a tunnel.
- Cut straight up one of the tall seams then cut off the top and bottom folding sections. You should now have one long piece of cardboard with straight edges all the way around.
- Fold the box in half lengthwise and crease on the fold.
- Cut along the crease to end up with two long, thin pieces of cardboard.
- Tape the two pieces together by overlapping one end of each piece about three inches.
- Cover the entire long piece of cardboard with paper by cutting and gluing it to both sides of the cardboard strip.
- Fold one end of the cardboard about three inches in from the end. Attach this folded piece to the book's front cover with glue or tape.
- Repeat Step 7 using the back cover of the book.
- Write one letter from the child's first name on each square of cardstock. If the name is longer than six letters you'll want to either use her initials or smaller pieces of cardstock.
- Glue each cardstock square, evenly spaced, to one side the cardboard strip.
- Repeat Steps 9 and 10 for the other side of the cardboard strip, making the banner double-sided.
- Fold the cardboard strip between each letter, alternating the direction of your fold each time, to get an accordion fold look.
- Stand the banner along the center of the table.
For a more uniform accordion fold, tape larger squares of cardstock together end-to-end until it reaches your desired length, then attach each end to a book cover. You could add photos or a phrase that matches your shower theme to the banner instead of baby's name.
Quick Centerpiece Ideas
Planning a baby shower takes a lot of time and organization. Save time and money with cute, quick centerpieces made from household items, baby gear, or other baby shower decorations. Look for things babies use or something reminiscent of your theme that you can grab and set in the center of the table.
- Line the center of the table with rubber ducks.
- Fill baby bottles with baby's breath and group in pairs or trios for a simple floral arrangement.
- Use alphabet wooden blocks to spell out a message in the center of the tables.
- Make small homemade gift baskets to use as table decorations by filling low baskets with baby items like stuffed animals and rolled onesies.
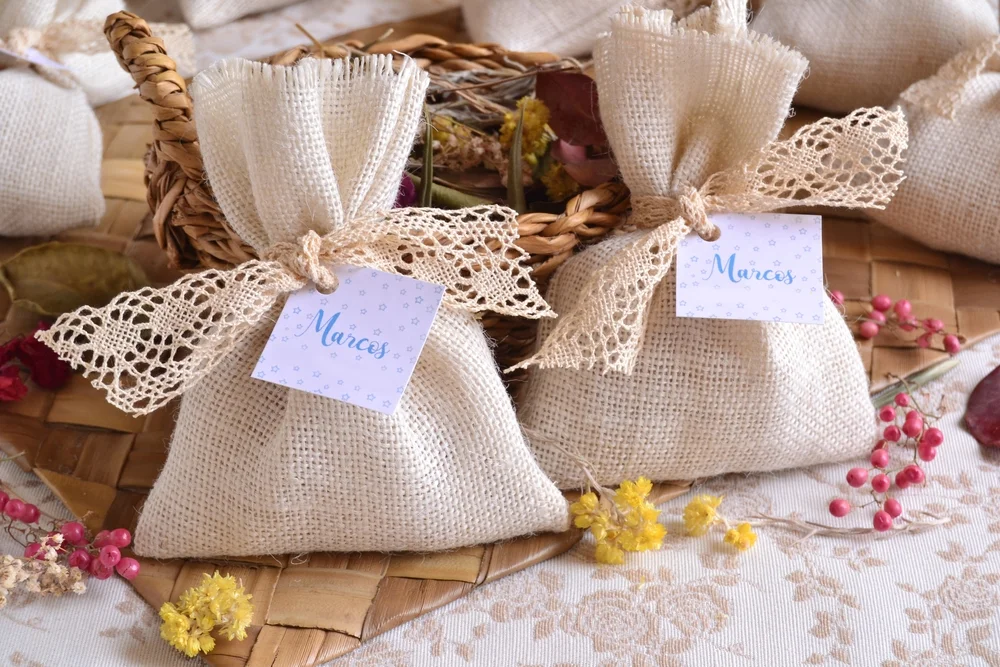
- Display favors in a random pattern across the length of the table.
- Stack baby board books in piles of 3 along the center line.
- Lay a baby shower wreath flat in the center of the table.
- Fill tall, clear vases with pacifiers and group in trios.
- Open up a bunch of tiny cocktail umbrellas and float them on top of water in a glass bowl.
- Use upside-down wineglasses to display cupcakes or cookies by placing one under each glass and one on top of each glass.
Festive Table Toppers
Themed centerpieces add to the atmosphere at any baby shower and give guests an easy conversation starter. Help keep your guests excited about the event with creative, original centerpieces meant to grab their attention.