
Homemade baby shower decorations can be just as beautiful as store-bought items that you often pay a small fortune for. Homemade decorations typically inspire conversation and admiration and are more meaningful to the parents-to-be because they were created with love and care. These 20 cute and creative DIY baby shower decorations will set the party off!
DIY Baby Shower Decorations for Tables
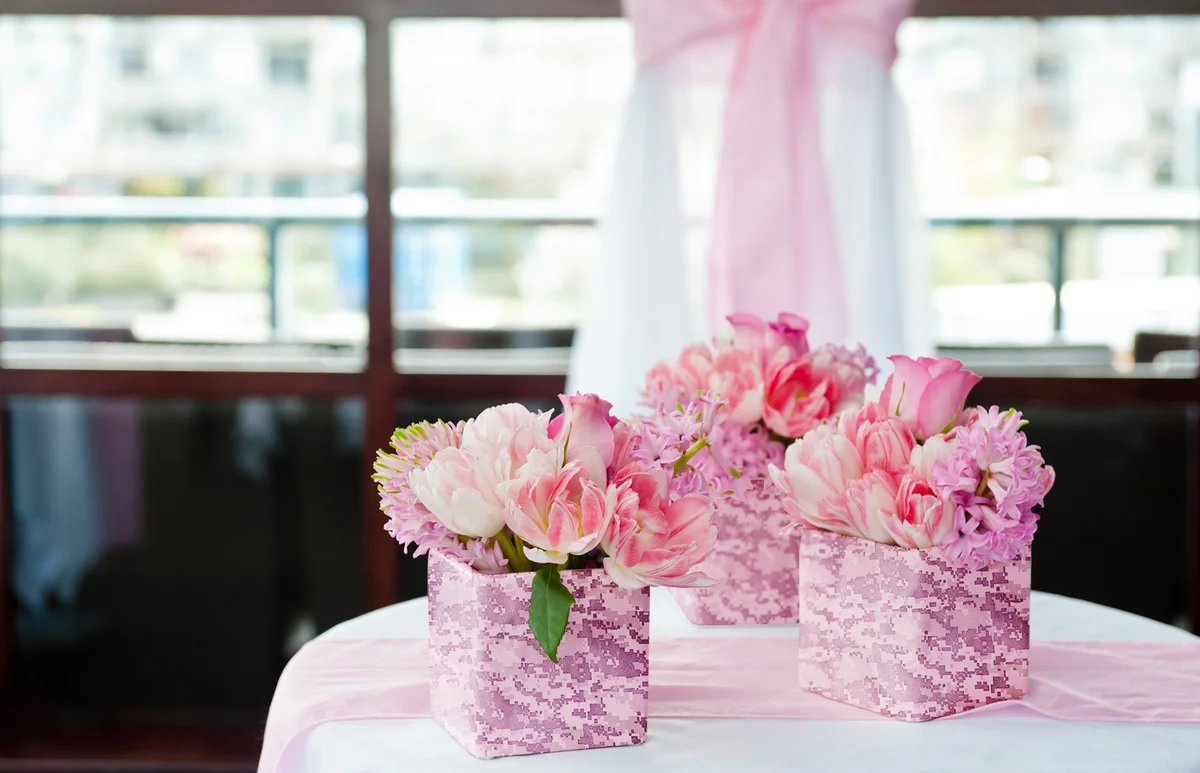
Everyone loves a good centerpiece! When planning decor, it is worth spending some and creativity on your table centerpieces. The guests spend most of their party time seated at tables eating, socializing, and playing games, so centerpieces, tablecloths, and table-related decor end up getting a lot of eyeballs on them. These cute and easy DIY baby shower decorations for tables will complement any theme or vibe.
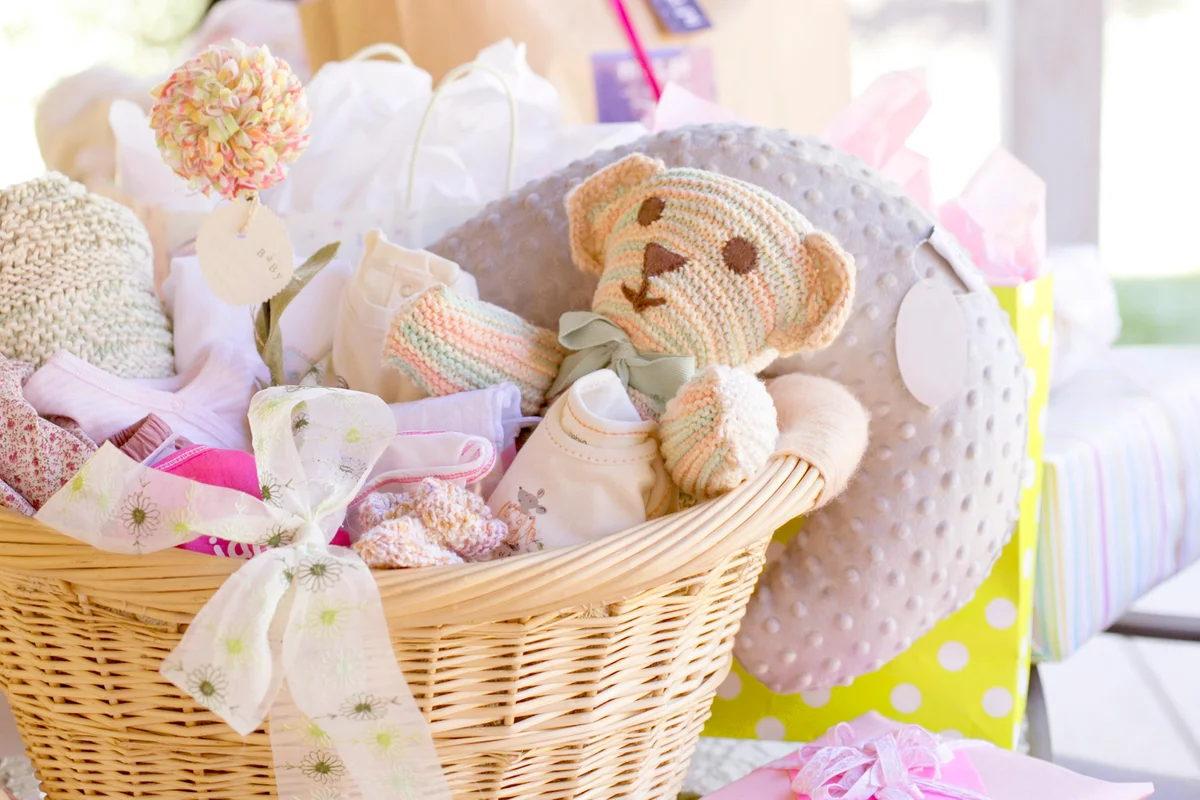
Practical Baby Shower Centerpiece Basket
If you know the theme of the baby's nursery, you can create darling and very useful centerpieces that match that theme. Centerpiece baskets should serve the purpose of decoration and purpose, so put some thought into what goes into each one as moms-to-be can get serious use out of the basket contents after the shower.
- Purchase essential infant items like stuffed toys, figurines, books, receiving blankets, washcloths, bath toys, teething rings, and pacifiers. Consider colors and themes of the baby shower and buy items relevant to the theme.
- Buy cute, decorate baskets that will serve as the table centerpieces. Get one for each guest table.
- Put some festive filler material in the basket and arrange your items in it nicely.
- Tie a color-coordinated ribbon or some helium balloons on the handle.
- Place one basket on each guest table.
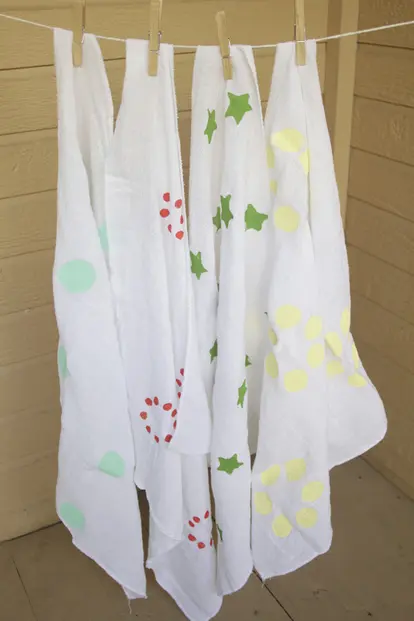
Burp Cloth Placemats
A new mom can never have too many burp cloths, so these homemade decorations can be used again after the baby arrives. You'll need to plan on one burp cloth per guest/table setting, so know the number of guests attending long before the shower or make plenty of extra placemats in case the guest list changes. This project takes some time to complete, so plan to make your placemats well ahead of the shower and enlist the help of crafty friends.
- Purchase white burp cloths in bulk (one for each shower guest plus extras.)
- Using fabric paints, create a cute border design around the edge of each burp cloth. The sky is the limit here!
- Let each burp cloth dry according to the directions on the fabric paints. Some paints recommend ironing after drying to set the design permanently.
- On the day of the shower, lay a placemat at each setting as you prepare your tables.
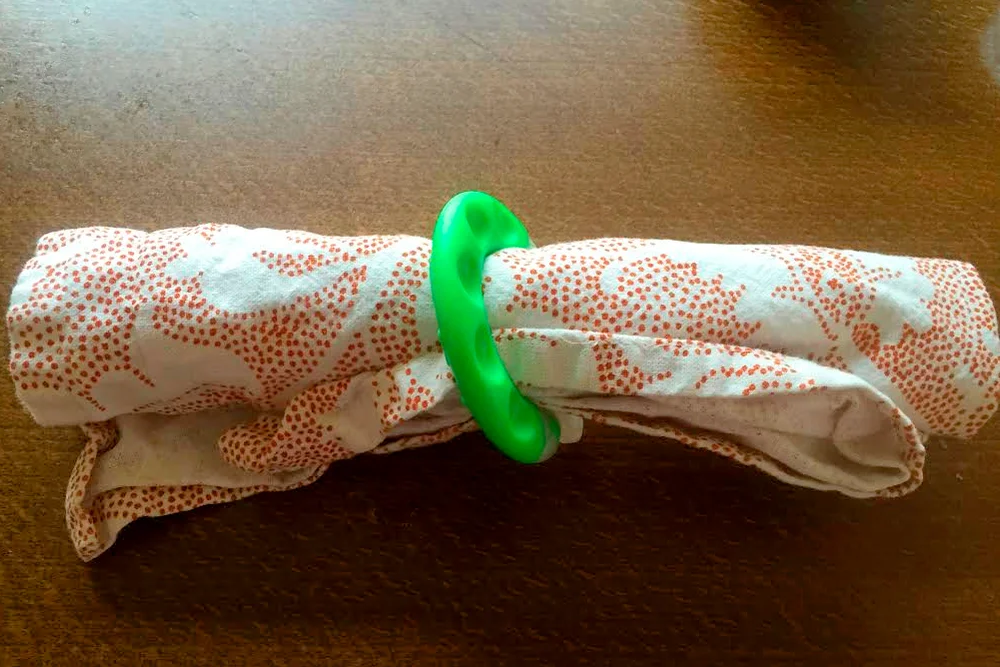
Baby Fun Napkin Rings
This project couldn't be easier, and the best part is, it is completely practical for new parents. You'll need an assortment of teething rings, pacifiers with handles, and baby key rings. Roll up your pretty cloth napkins and thread them through the rings on these items. Lay each napkin and ring at each place setting set at guest tables. Be sure to choose a good assortment of these items because the guests can donate them back to the mom-to-be.
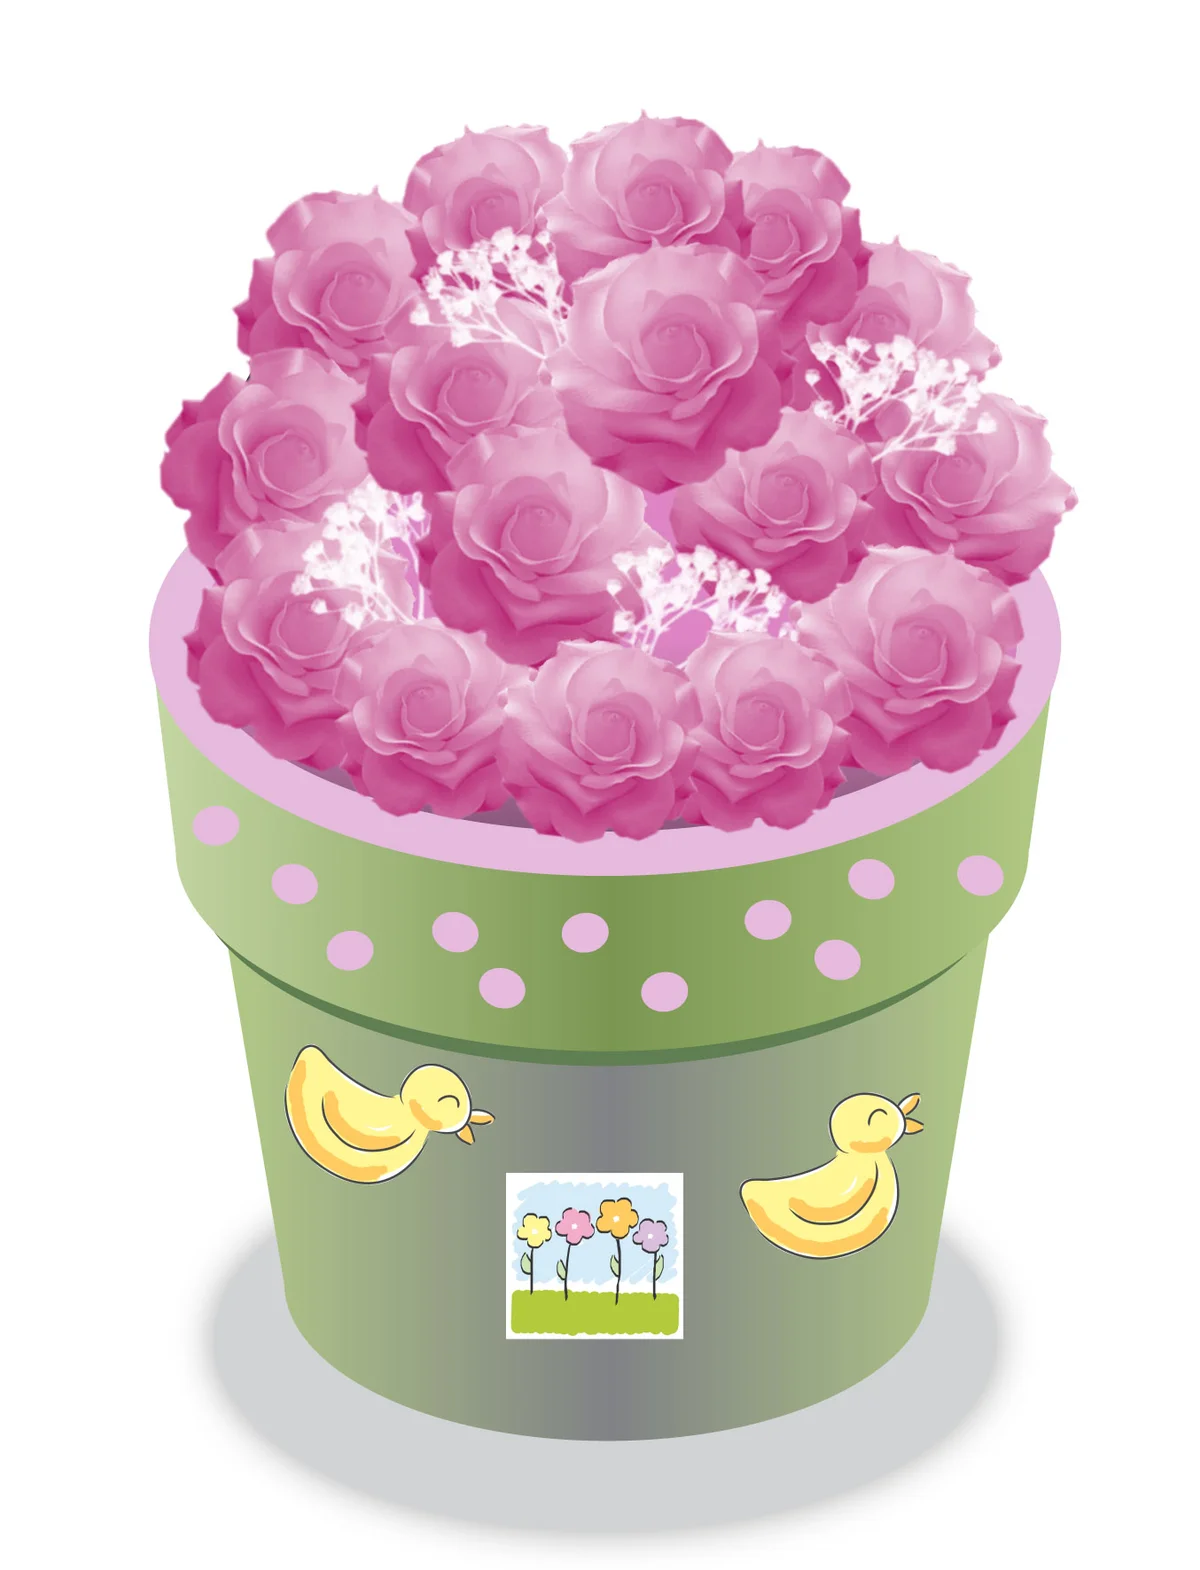
Nursery Topiaries
Baby-inspired topiaries will easily find a home at baby shower guest tables. This project is a bit labor-intensive, so give yourself enough time to complete everything before the shower or assemble a gang of crafty friends who are dying to get out of their houses and lend a hand.
To create each centerpiece topiary, you will need:
- One 5-inch clay pot
- One 5-inch Styrofoam ball
- Acrylic paints in assorted pastel colors
- A set of baby stickers (one pack per pot)
- Ribbon (optional)
- Hot glue gun and glue sticks
- Small, dried roses and baby's breath or faux flowers
- Sponge paintbrush
To create your topiaries:
- Paint the outside of each pot with your chosen color(s) and let pots dry.
- Decorate the pots with stickers and/or ribbon
- Working with one pot at a time, run a bead of hot glue around the inside rim, and press a Styrofoam ball into the pot.
- Beginning around the outside edge, glue the roses onto the balls, adding small sprigs of the baby's breath to fill in any open spaces between the flowers. Faux flowers can also be glued on or inserted stem first into the foam ball.
- When all the Styrofoam balls are covered and the glue is set, your topiaries are ready to display.
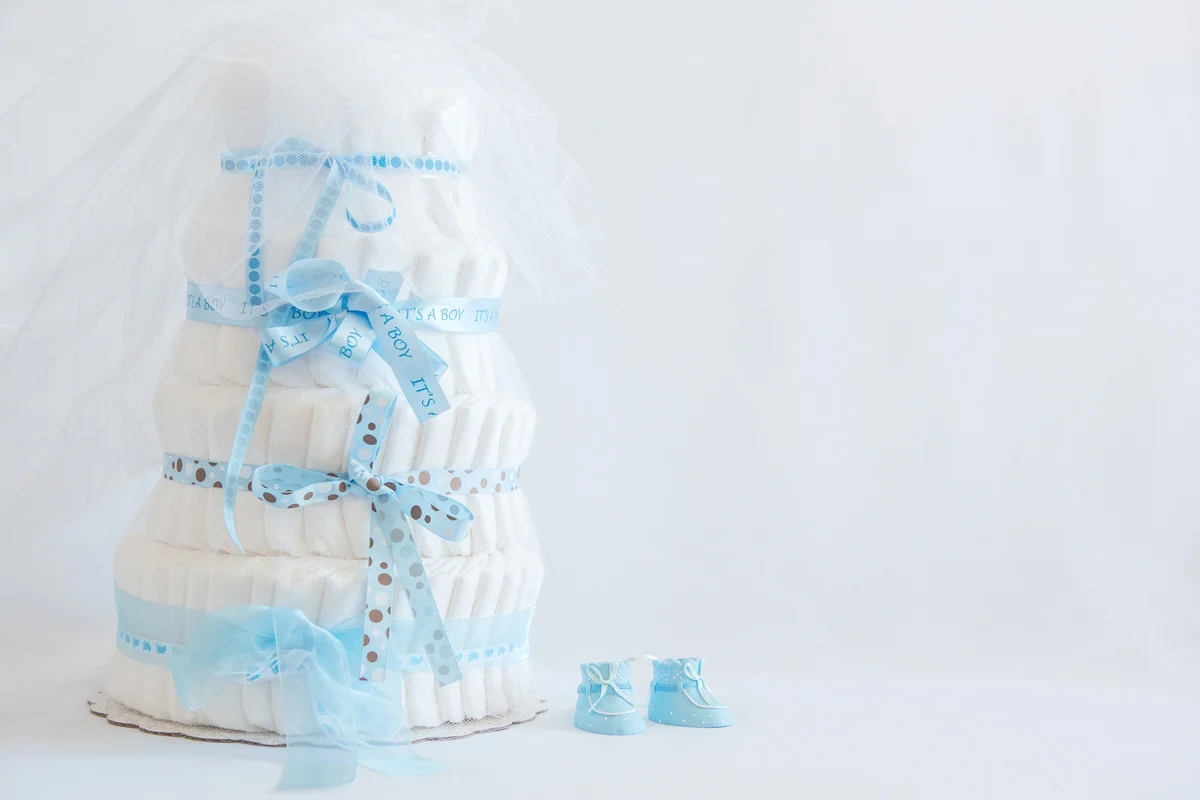
Diaper Cake
Diaper cakes have become very popular in recent years, and they do double duty as gifts and decorations. You'll need about 22 plain or printed disposable diapers, tape, and enough ribbon to tie around all three tiers.
- Starting at one side, roll each diaper into a tube, and use a small piece of tape to secure the tubes,
- Stand three tubes on end and tie a length of ribbon around them to create the top tier.
- Gather seven tubes together, one in the middle and six surrounding it, and tie that set together with a ribbon.
- Gather twelve tubes together, three in the middle and nine surrounding them, and tie them together with a ribbon.
- Stack all three tiers together to create the final diaper cake.
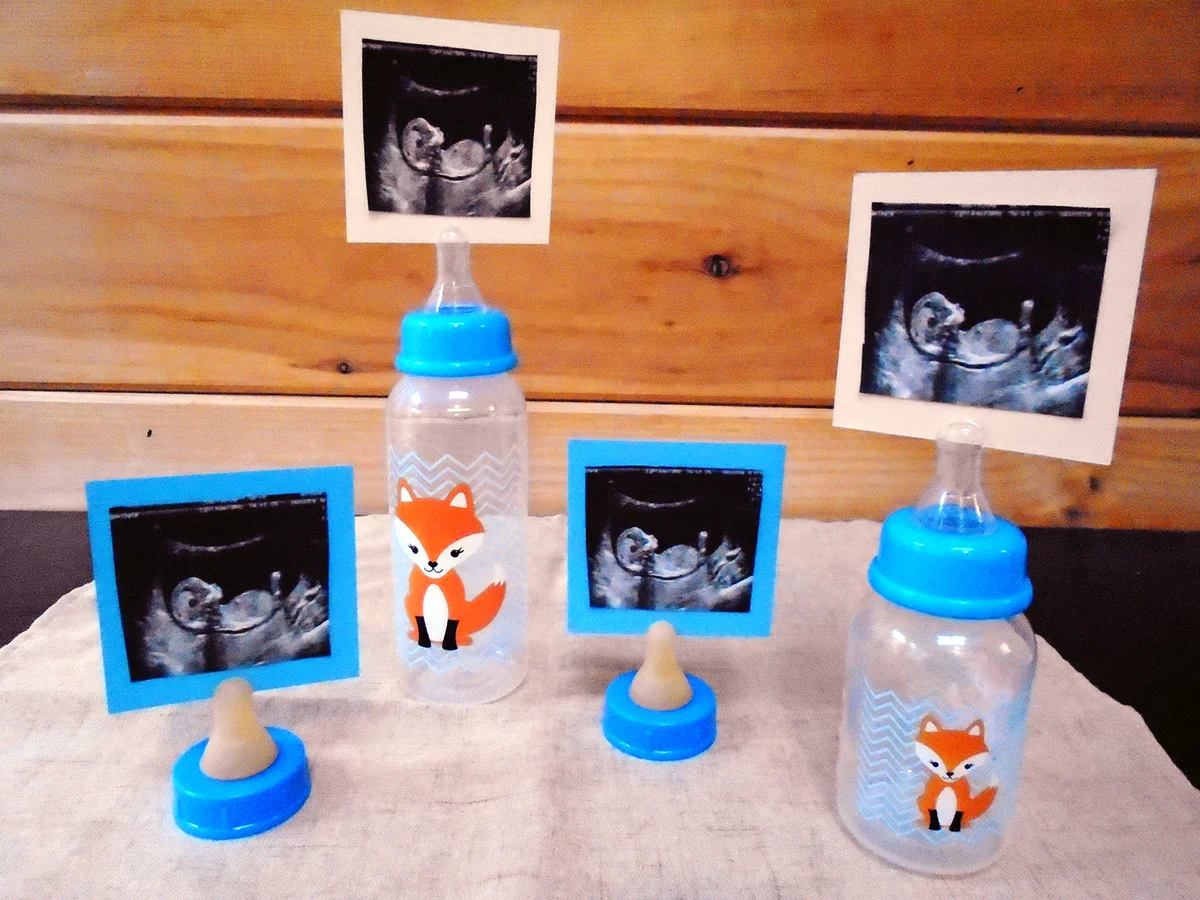
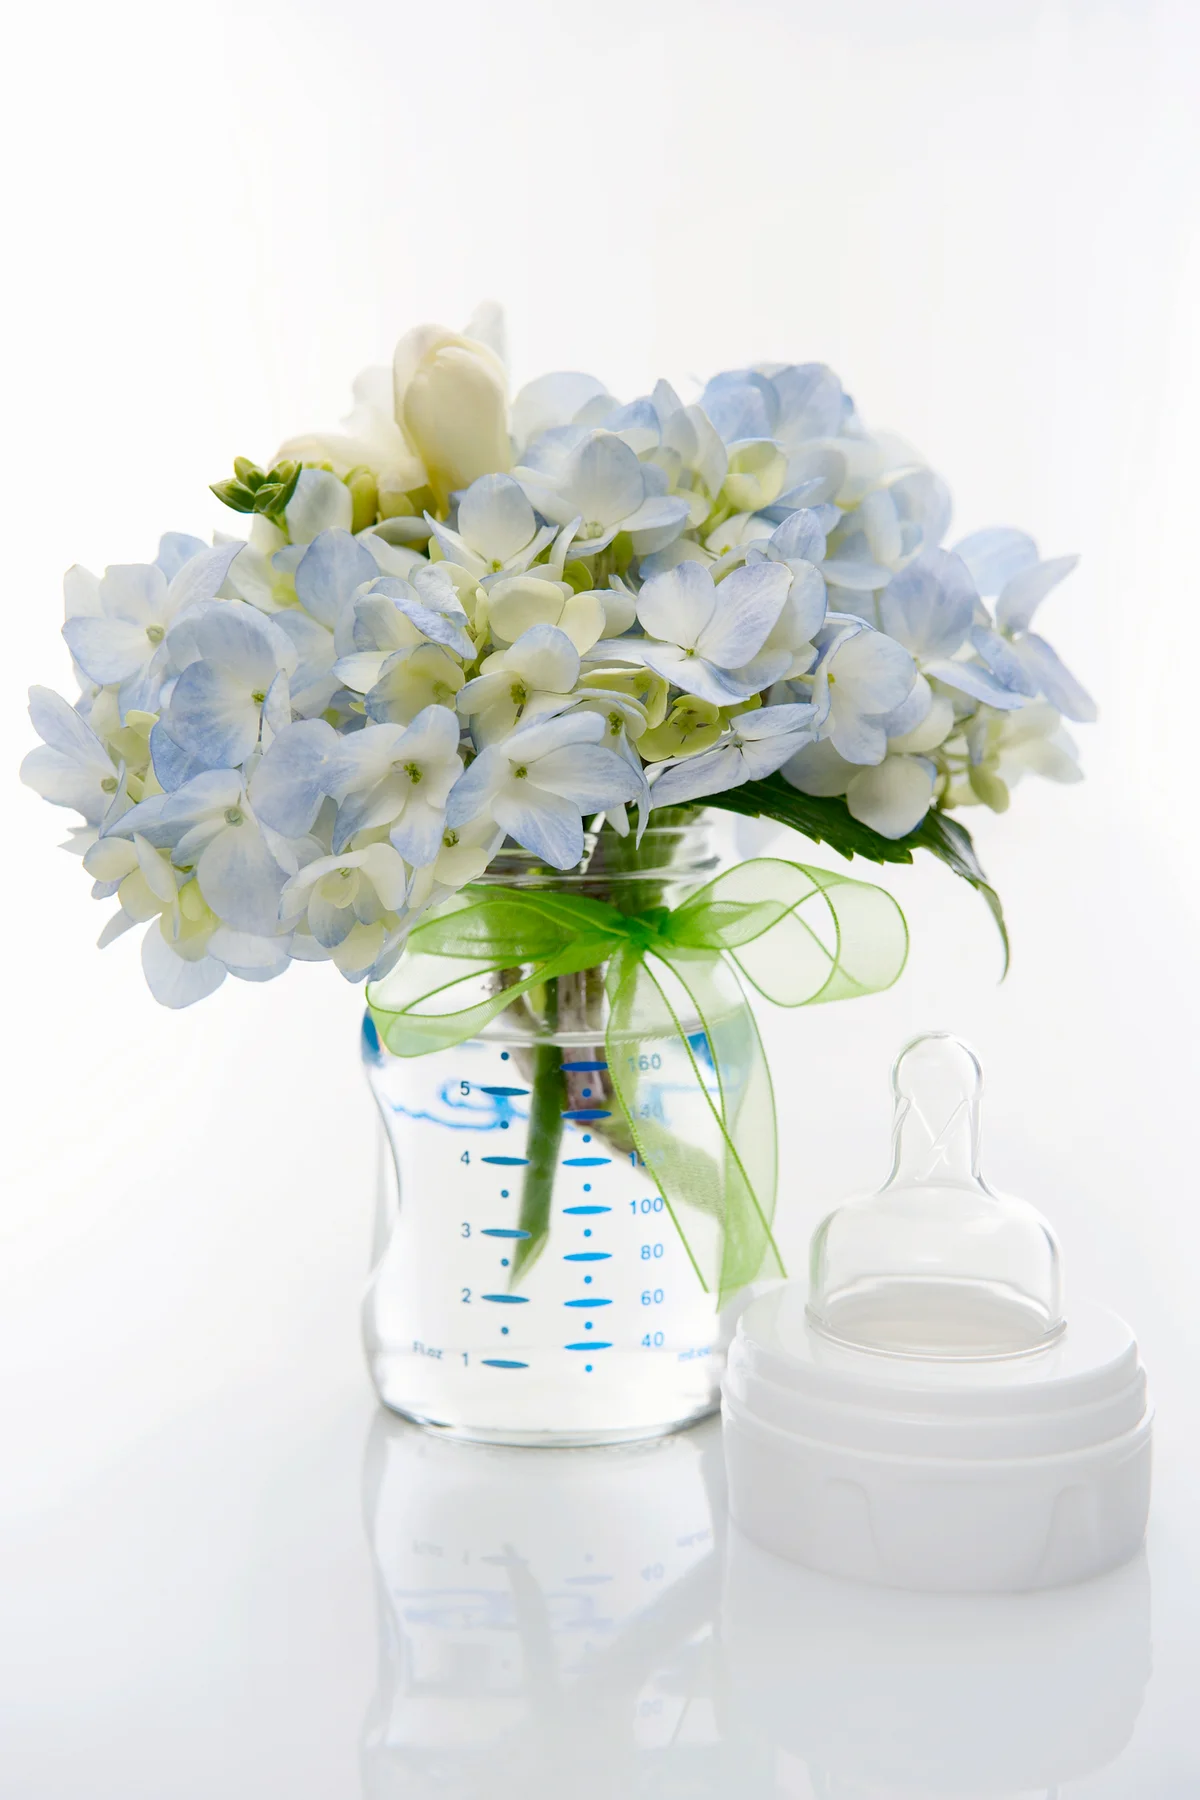
Baby Bottle Vases
Convert baby bottles into adorable little flower vases that you can place on tables around the room.
- Buy fresh-cut flowers the day before the shower and keep them in your refrigerator. You'll need enough to create a small bouquet for each bottle. If you need to make these decorations ahead of time, use faux flowers.
- Unscrew the rings and remove the nipples from all the bottles.
- Screw the rings back on the bottles, and save the nipples in a plastic bag for later use.
- Fill the bottles three-fourths full with water. Do not use any floral preservatives.
- Cut the flower stems to size, and arrange a small bouquet for every bottle.
- (Alternative) If you are using faux florals, fill the bottom of the base with blue-hued jewel-toned stones to emulate water and weigh the fake flowers down in the bottle.
- Place the bottle vases on every table and around the room in any place that could use a little decoration.
- After the shower, sterilize all the bottles, put the nipples back on them, and give them to the mom-to-be.
Rainbow and Cloud Centerpieces
If you are throwing a baby shower for a friend expecting a rainbow baby, these centerpiece ideas will elevate the gathering and touch everyone's hearts. Very few items are needed to assemble these floral centerpieces. For each one, you will need:
- Vases or holders with wide top opening
- Foam floral holders (for natural blooms, NOT faux)
- White flowers of any bloom of your choosing (think flowers with large poofy blooms)
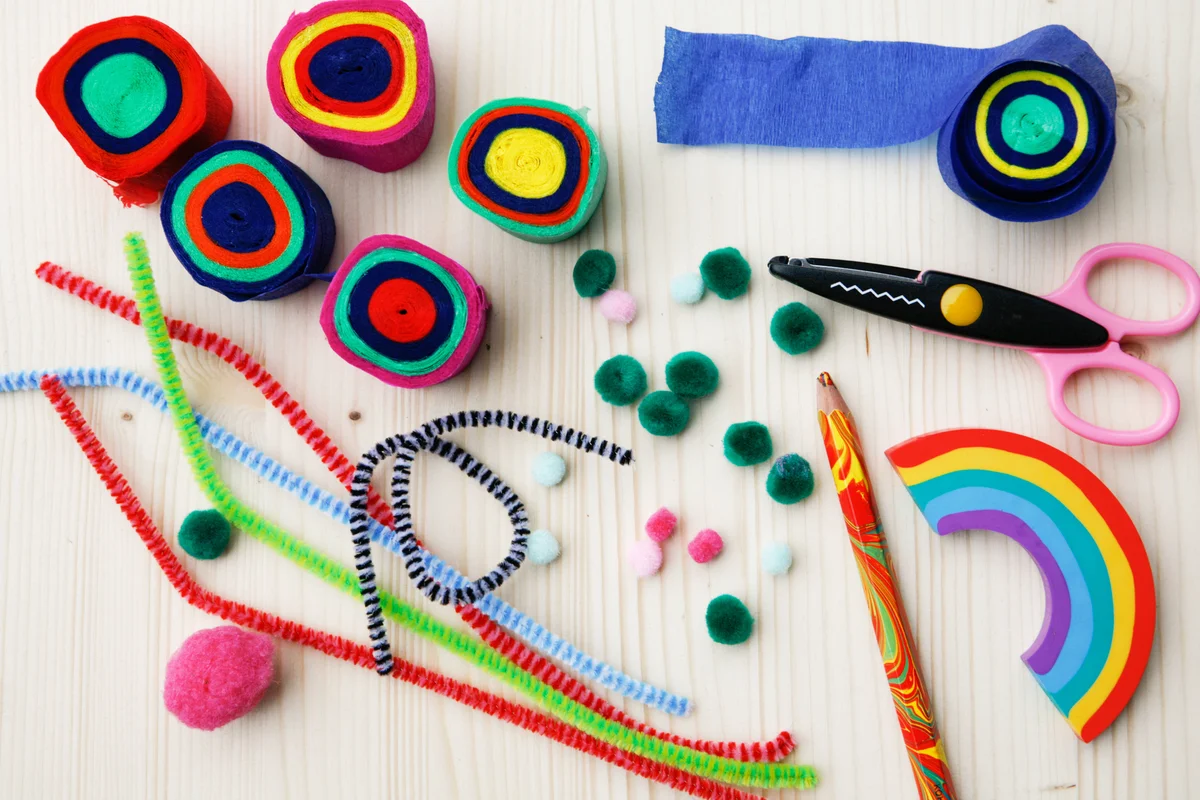
- Pipe cleaners in varied colors
- Hot glue to hold pipe cleaners together and to the vase or flower holder.
To create these rainbow and cloud centerpieces:
- Cut the floral foam to fit inside of your container or vase.
- Soak the foam in water and set it inside of your container.
- Cut the stems of florals so that they are long enough to poke into the foam but short enough so that when inserted, only the bloom is showing.
- Arrange flowers to cover the foam. This will give the effect of clouds.
- Lay five different colored pipe cleaners next to one another so that they resemble a rainbow. Twist them or leave them flat. Arrange them in the shape of a rainbow handle and attach them to the container. Use hot glue to help the rainbow pipe cleaners hold their shape.
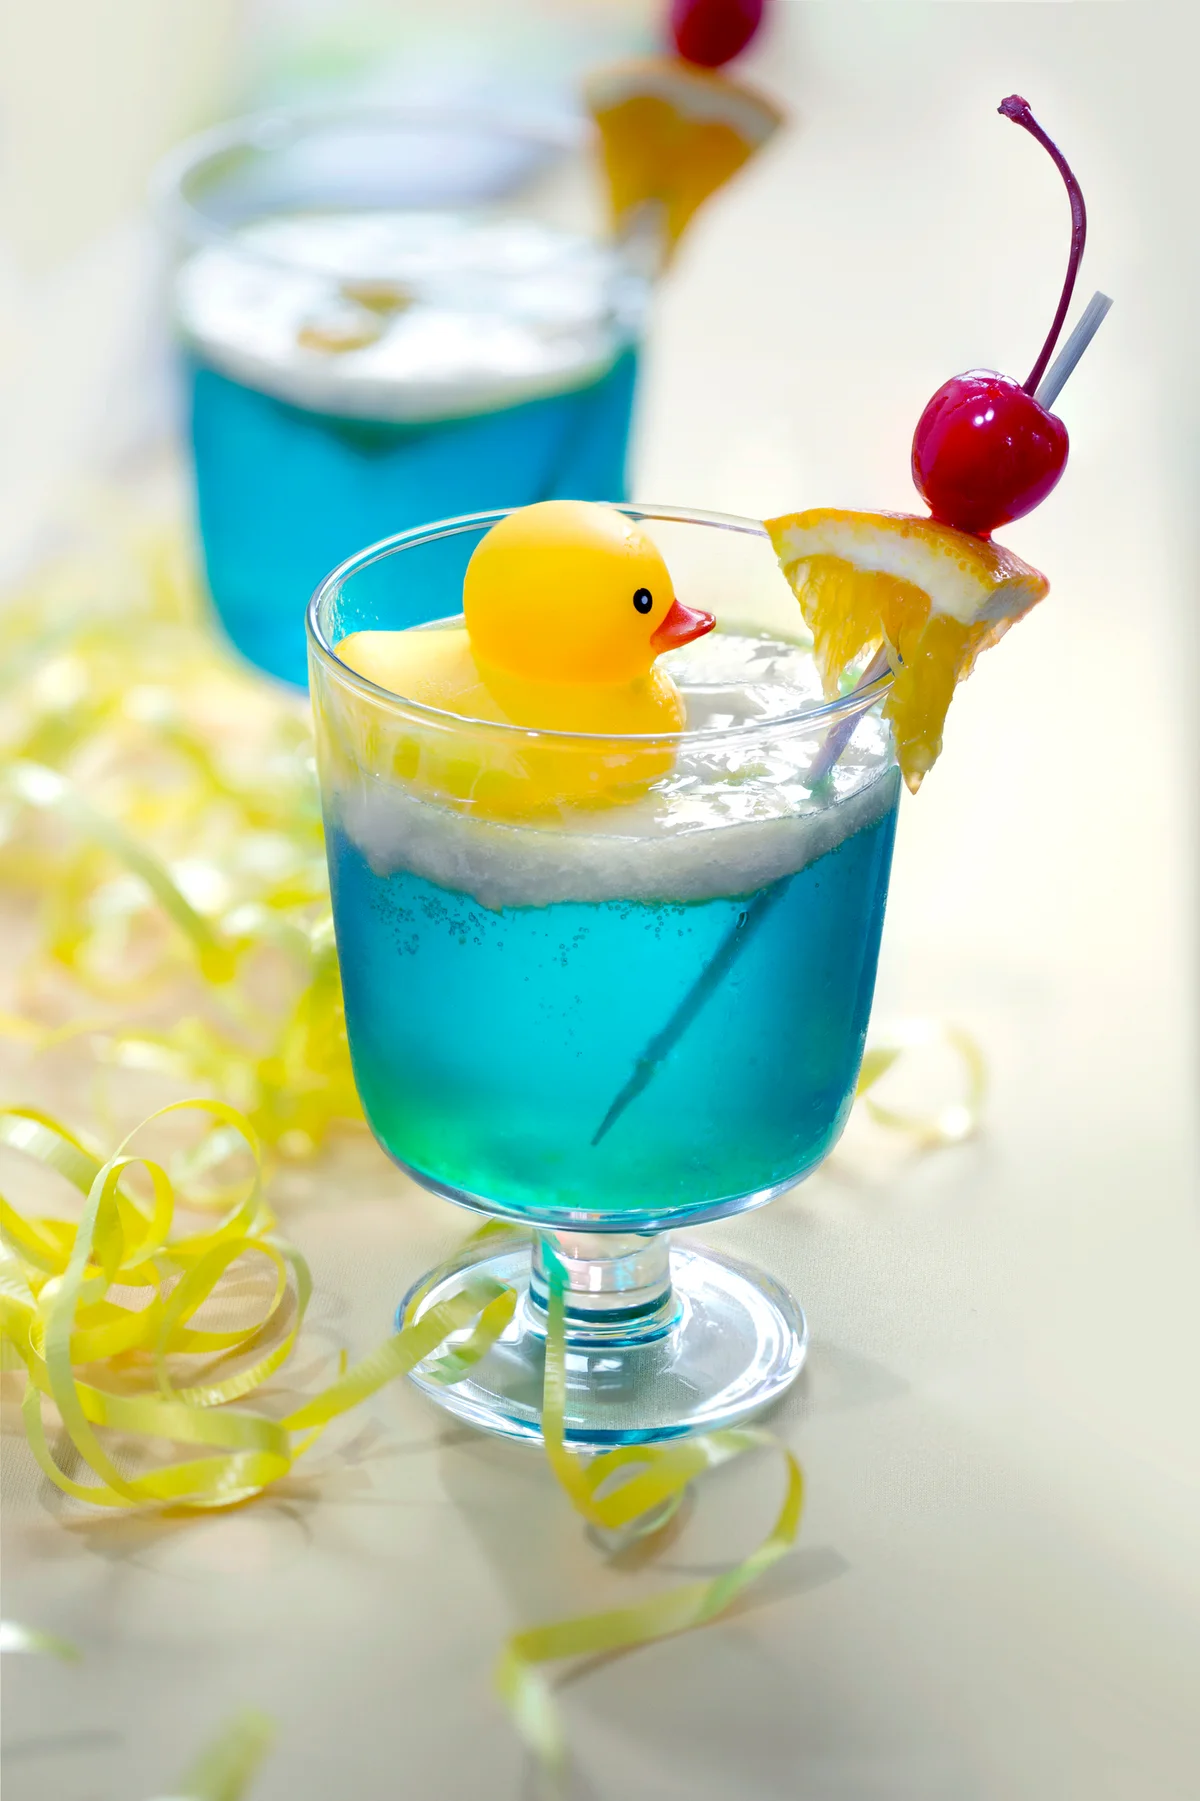
Darling Duckies
Duckies and baby showers are a timeless combination. For a fun, easy, and cost-effective centerpiece, arrange rubber duckies in glass bowls. For each one of these table decorations, you will need:
- A glass fishbowl
- Transparent and blue decorative stones (enough to fill each bowl ¼ and ½ up.)
- Plenty of rubber duckies
In each bowl, pour stones in to fill the bowl between a ¼ and ½ way up. Set a couple of rubber duckies atop the stones. Boom. This could not be more simple.
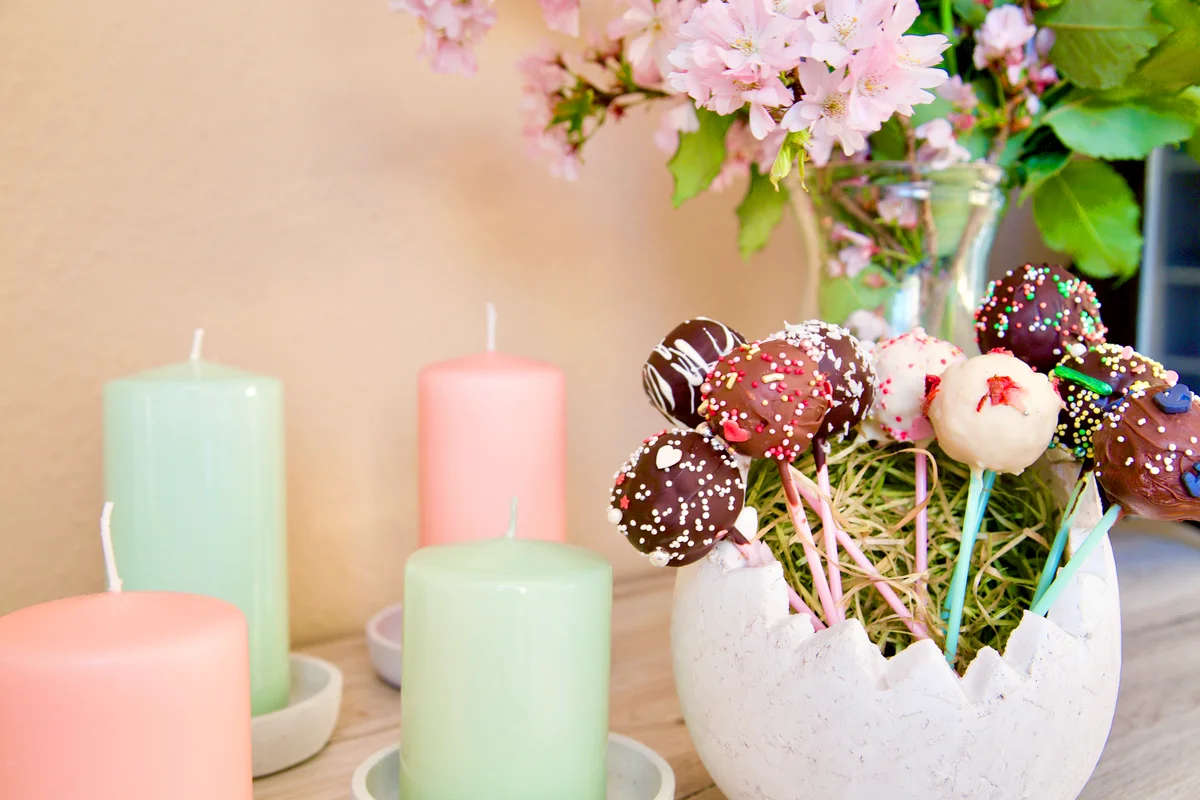
Lots of Cake Pops
Another fun centerpiece that will have a place at any dessert table is a bouquet of lollipops. For each lollipop centerpiece that you want to create, you will need:
- One 5-inch clay pot
- One Styrofoam ball that will snugly fit inside of the pot so that part of the ball is in the pot and the majority of the pot is above the pot's rim
- Acrylic paints in assorted pastel colors
- Hot glue gun and glue sticks
- Cake pops or dum dum suckers
To create a delicious decorative element:
- Paint each pot and let them completely dry.
- Using the hot glue gun, create a ring of hot glue on the inside rim of the painted pot. Set the ball in the pot and hold it in place as glue sets.
- Press the stick of the cake pop or sucker into the foam ball so that none of the stick is showing.
- Continue to push cake pops into the foam ball until the entire foam ball is covered in suckers.
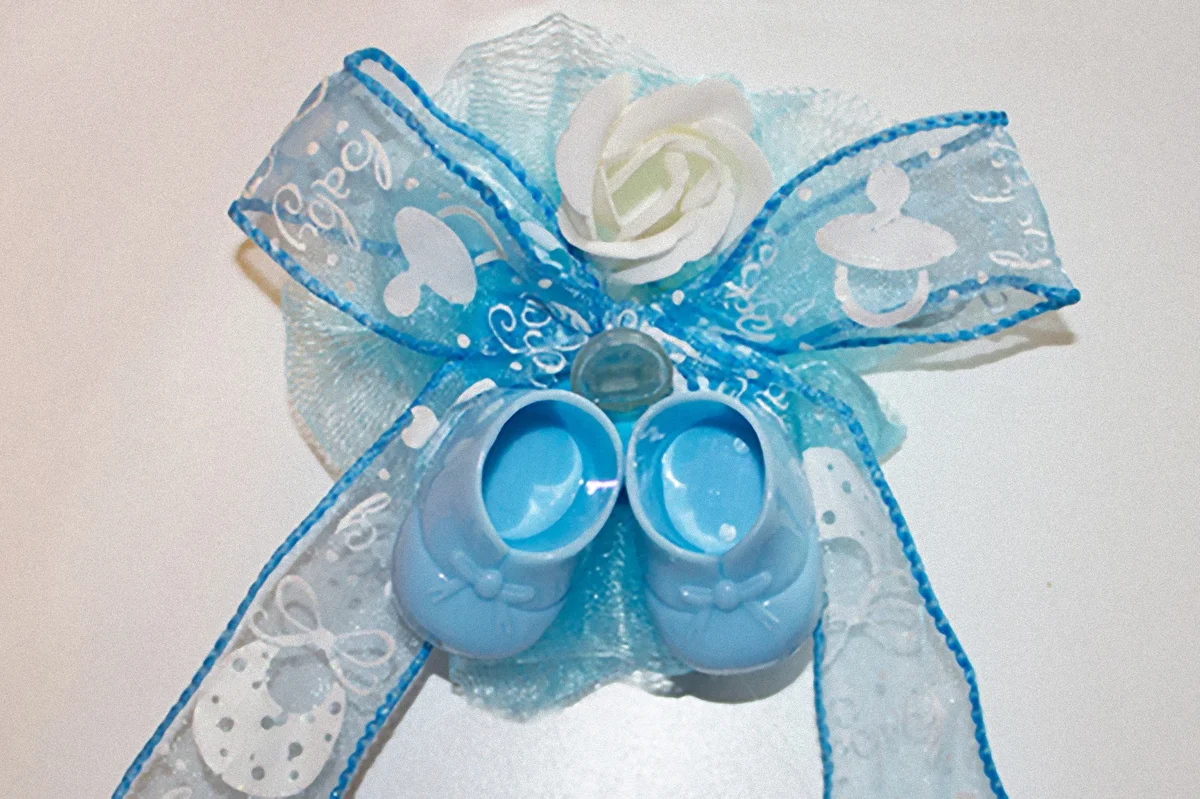
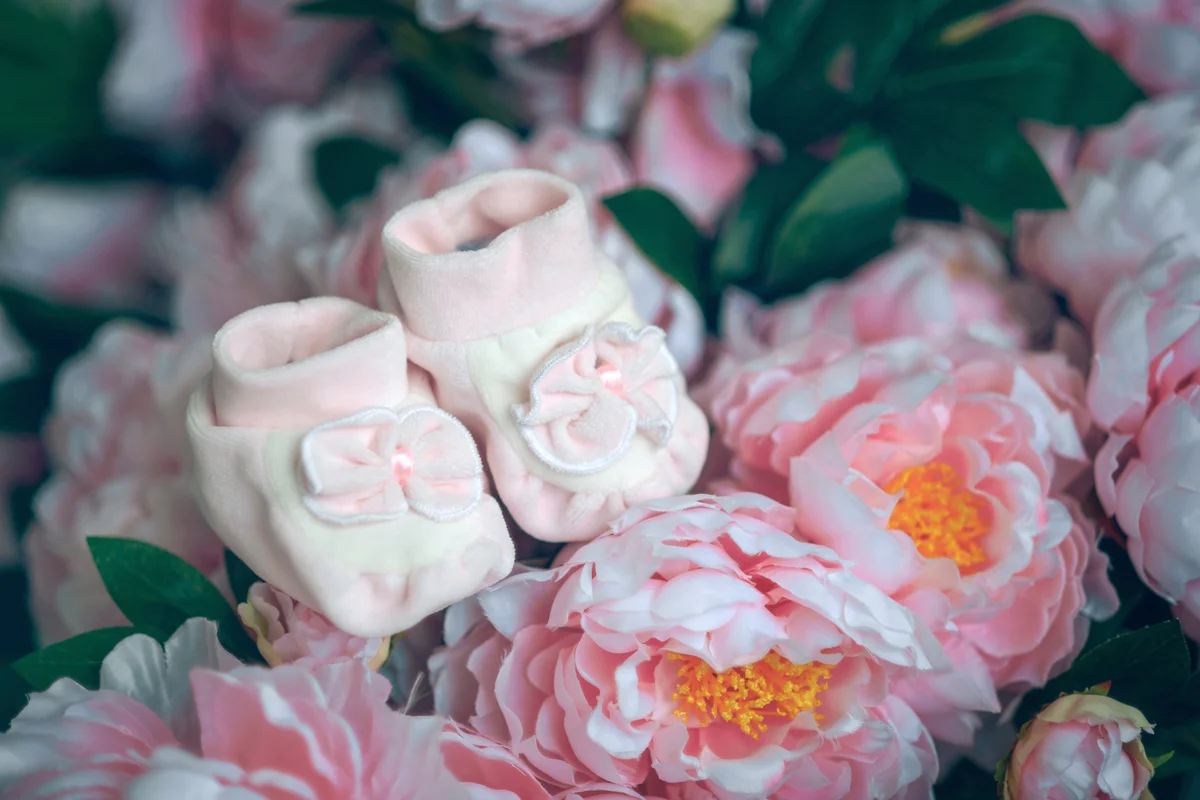
Baby Booties and Flowers
Baby shoes are precious, and they add a perfect touch to guest tables or gift tables at a baby shower. This decoration is simple and practical long after the party has ended. Purchase several pairs of baby shoes. Get a couple of different sizes since these design elements will transform into infant footwear for the baby-to-be. Set the shoes in different spaces needing an artistic touch. Cut some fresh flowers and place them inside of the shoe opening. After the showers, give the cute booties to the mama-to-be!
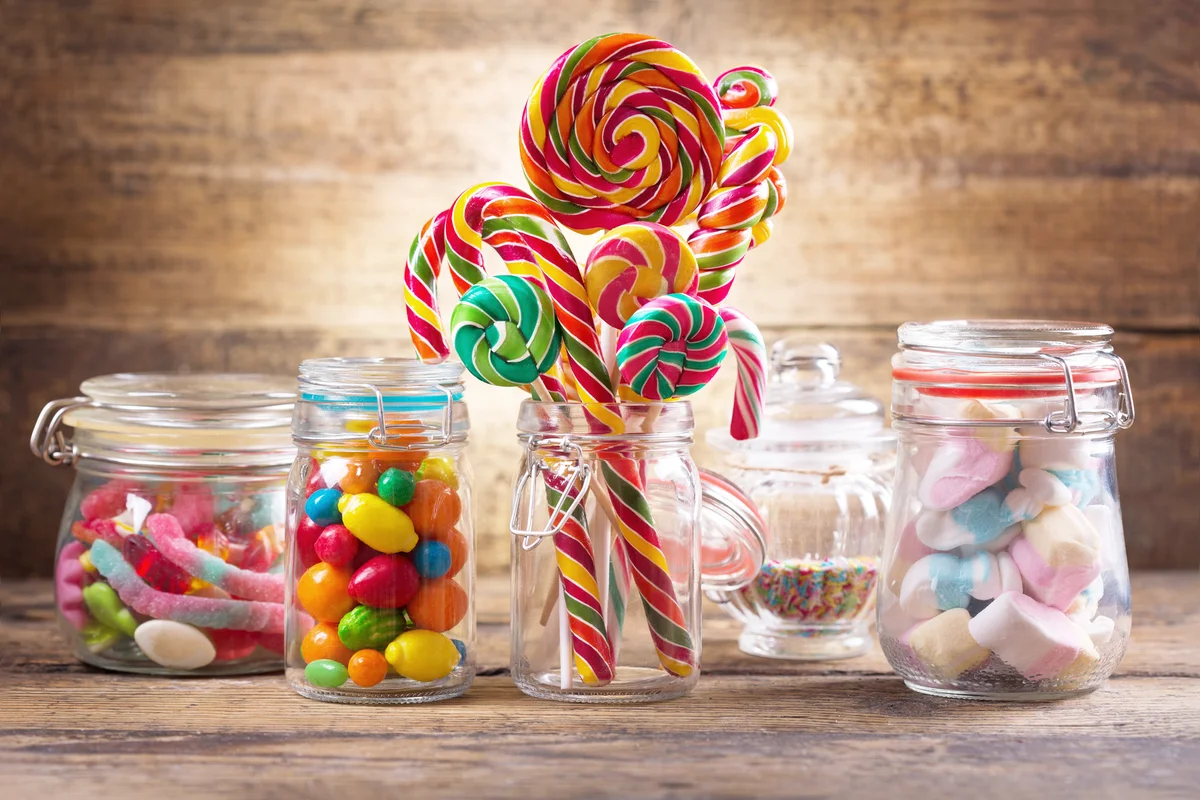
Jars of Color and Candy
No dessert table is ever complete without a candy bar. Candy bars will sugar up your guests, but they serve as gorgeous design elements in any space before it is time to take treats home.
- Purchase several glass bowls and tall vases or jars in numerous shapes and sizes.
- Arrange the jars on a table so that they are all nearby one another.
- Decide on a color scheme for the candy to go into the jars. This design element works best when all the colors are varying hues of one color, such as different shades of blue or pink.
- Buy different types of candy to put in each jar. Large gumballs, sticks of pretty rock candy, and other hard candy are all perfect options.
- Fill each container with a different type of candy. Keep the contents of each jar filled with the same candies to give the decorative element a fun, whimsical, and monochromatic appeal.
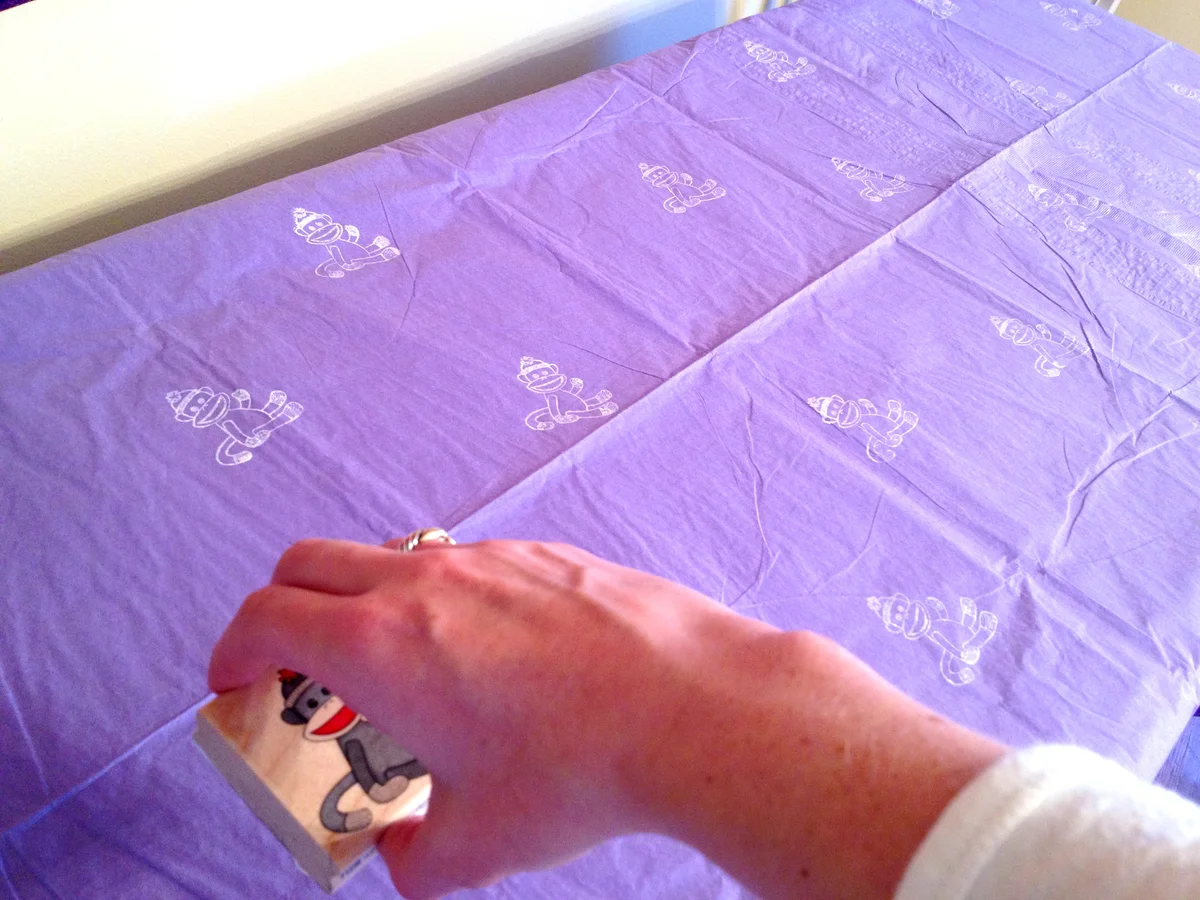
Custom Baby Shower Table Covers
With a few simple supplies, even your table covers can become part of the decorations. Customized table covers help tie baby shower themes together and adds a personal touch to even the smallest detail.
You'll need:
- One or more white paper table covers
- Stamp pads in one or two colors
- Baby-theme rubber stamps
To make your covers:
- Practice stamping on a paper napkin first to perfect your technique before you begin stamping covers.
- Spread out one cover at a time on a table.
- Press the stamp onto the inkpad.
- Repeat until each of your covers is filled with as many designs as you want. Stamp the entire table cover at random, or use stamps to create borders along the cover edges.
DIY Baby Shower Decorations That Everyone Will Want To Take Home
The decor enhances any party, baby showers included. These sweet and thoughtful DIY baby shower decorations will have a place at any party and have guests asking if they can snag them after the bash is over!
Standing Baby Sign
This pretty sign can be decorated in any number of ways. You can paint the letters, glue silk flowers to them, cover them in rubber stamp designs, or add other artistic elements to letters on a wooden background. The directions here are for covering them with ribbon for a festive nursery look. Still, as long as you have the necessary letters, artistic accessories, and a creative mind, you can design any letter decor you want.
You'll need:
- Letters to spell BABY or the name of the baby-to-be, available in custom sizes at Craft Cuts.
- One-inch width grosgrain or satin ribbons in four complementary colors/patterns (or other design elements needed to decorate the letters.)
- Small, flat-head tacks or hot glue and a hot glue gun
- Whatever other embellishments you want
To cover your letters:
- Begin by tacking a piece of ribbon to the back of the first letter.
- Wind the ribbon completely around the letter to cover all sides, overlapping the edges slightly.
- Finish by tacking the end of the ribbon to the back of the letter.
- (Alternative to steps 1-3: hot glue design elements onto the letters.)
- Repeat the above steps for each letter.
- Add any other embellishments you like to the letters.
- Stand the decoration on a table. Apply double stick tape to the bottom of the letters if needed to stabilize them.

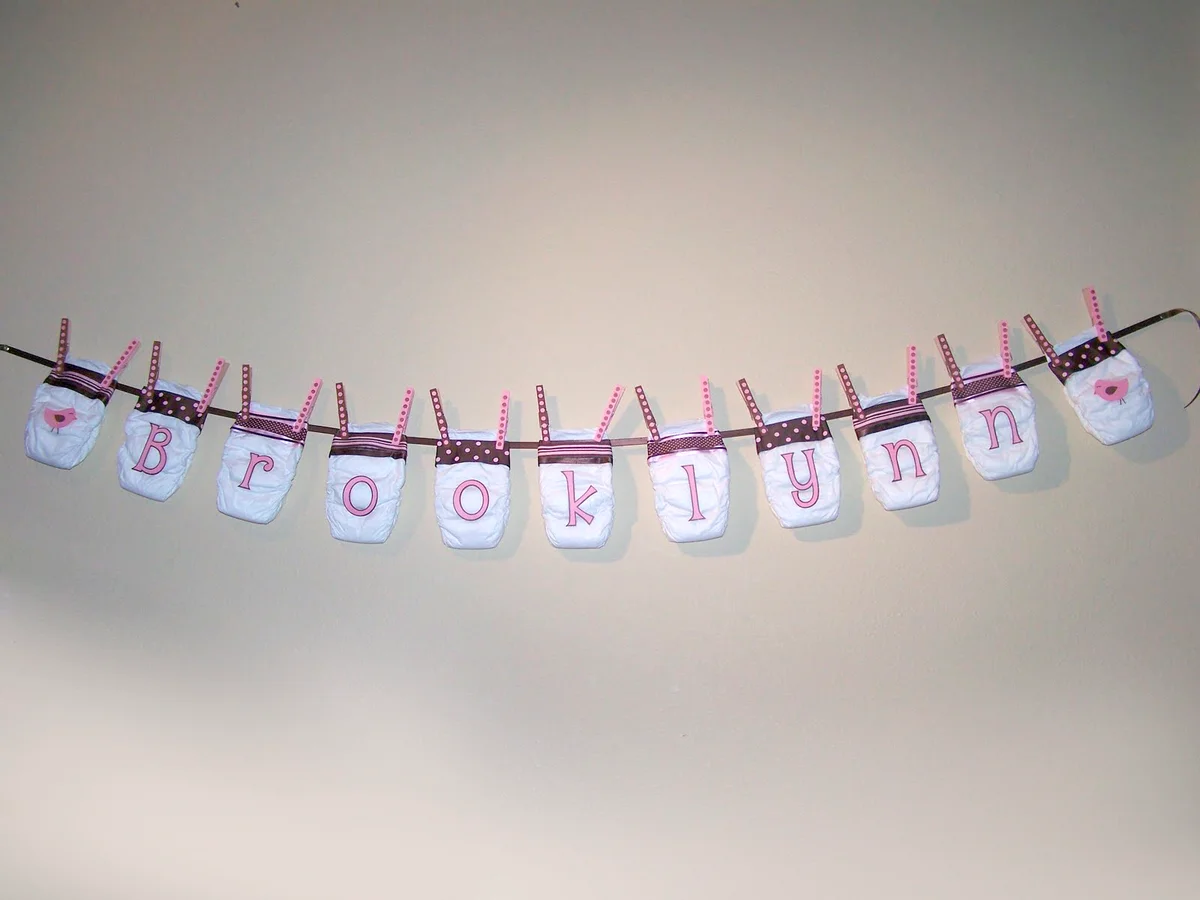
Welcome Baby Clothesline Sign
This idea is simple but very cute and cost-effective. Make a sign that says 'Welcome Baby!' sign using disposable diapers, puff paints, some clothesline, and some clothespins.
- String some clothesline across an archway or entryway long enough to hang all twelve diapers across with space between the two words.
- Lay the diapers flat on your workspace and begin drawing or painting one letter of the greeting on each diaper using the puff paint. You can do something simple like block letters, or you can get fancy if you have a lot of artistic talent.
- Decorate the clothespins with simple designs like tiny flowers, paint them or cover them with ribbon using hot glue or wood glue.
- Give the diapers and clothespins sufficient time to dry and then hang the diapers from the line with the clothespins.
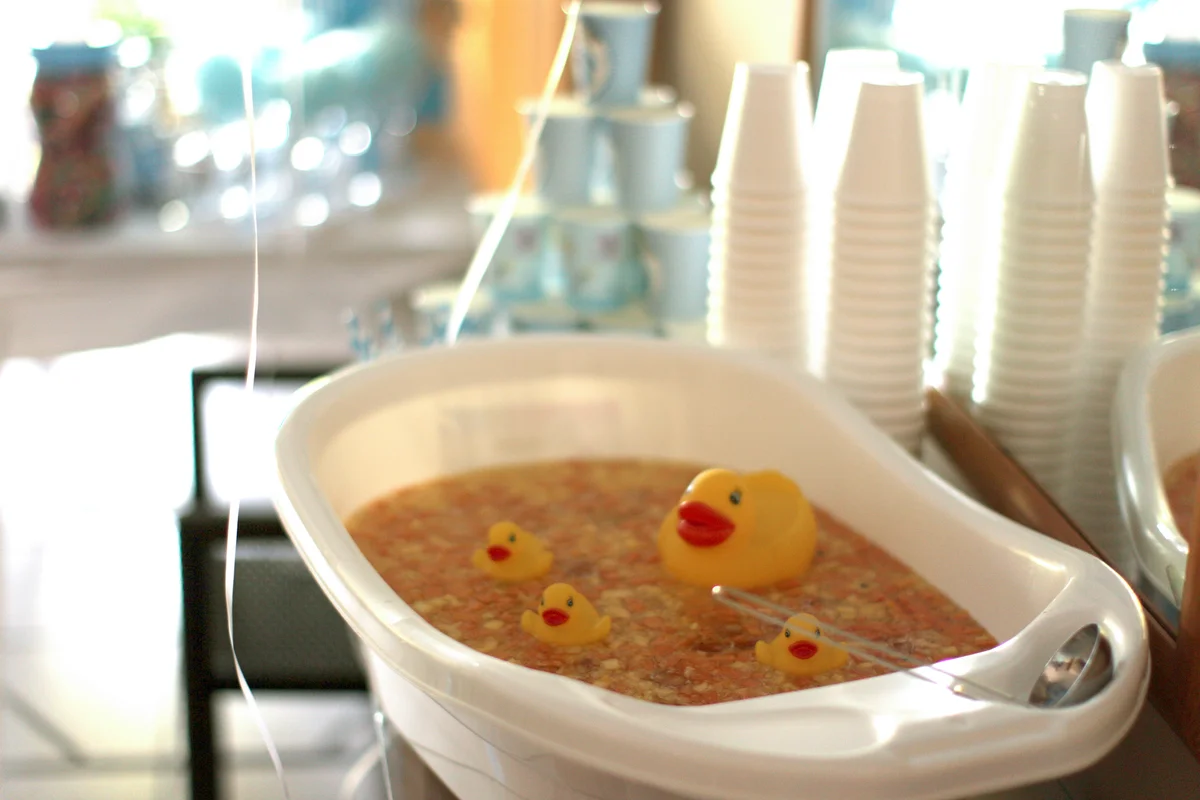
Baby Bath Tub Punch Bowl
This decoration is as fun as it is functional, and your guests will be impressed with your ingenuity. If you don't have a fancy crystal punch bowl to serve drinks in, use a bathtub!
- Purchase a plastic baby bath and clean it out.
- Wrap a beautiful ribbon around the sides of the tub, and tie a nice bow.
- Fill the tub with ice.
- Create a baby shower punch recipe that will delight your guests. Pour the contents of what you create into the bathtub.
- After the shower, clean the bathtub out and give it to the mom-to-be.
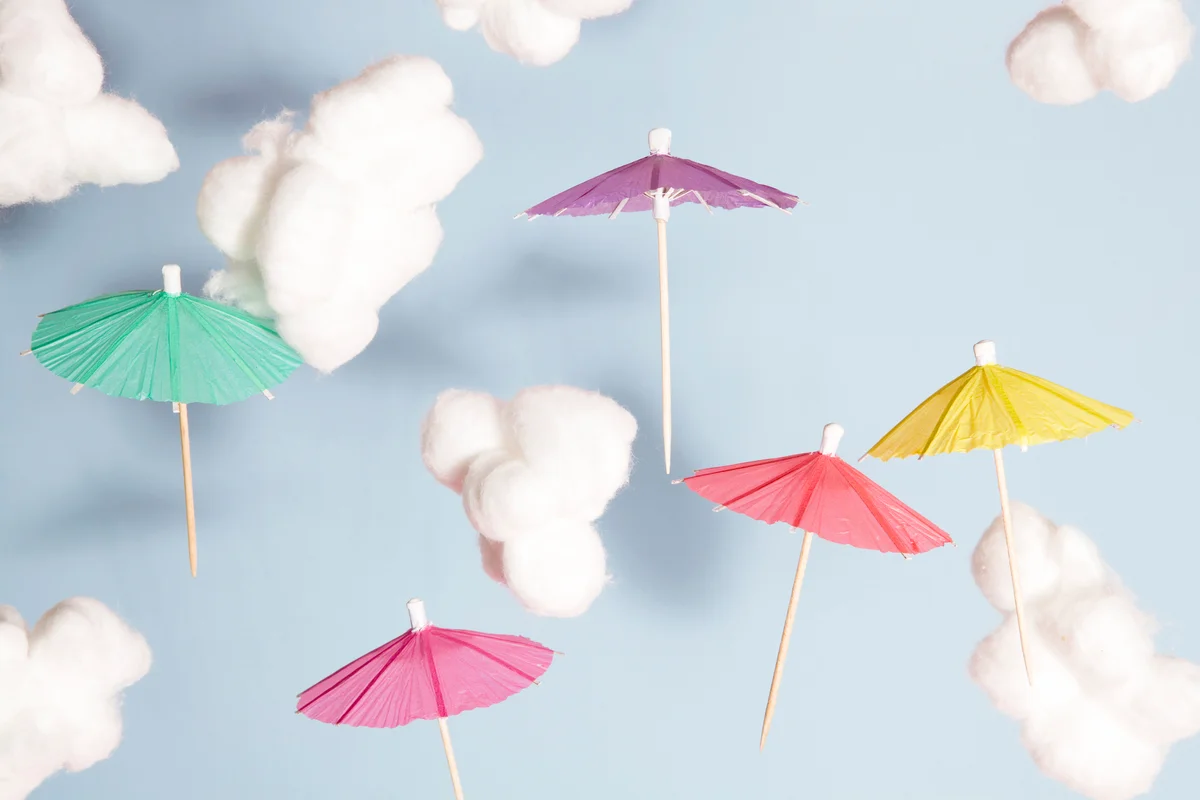
Shower Parasols
Pretty parasols make lovely shower decorations, especially for a spring shower or a baby sprinkle. Pastel colors work great for a baby shower, as do bright pinks or vibrant blues. Here are some creative ways to work parasols into your baby shower:
- Set them upside down aside a gift table or buffet table and pile pretty balloons inside of them
- Hang parasols from the ceiling
- Use tiny parasols in the center of floral arrangements
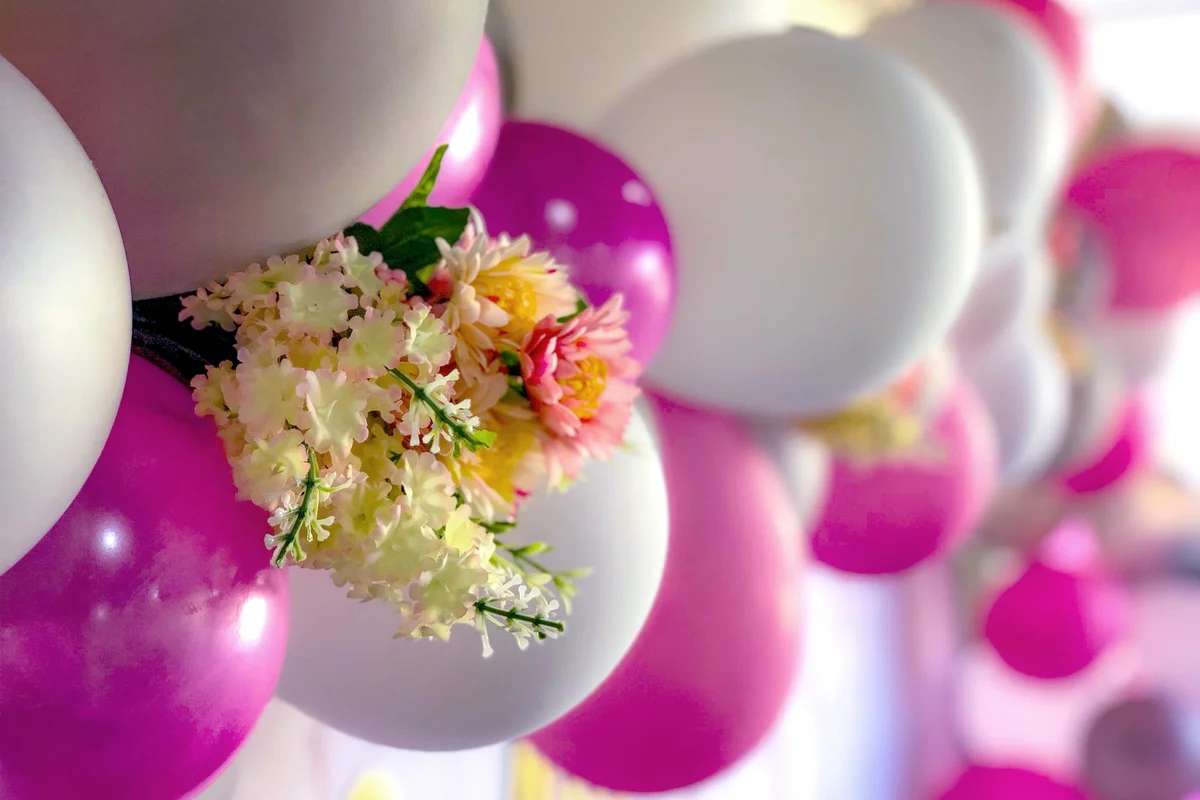
Floral Balloons
Balloons are popular decorations for most parties, and this includes baby showers. To put a pretty twist on your baby shower balloons, give them a pop of floral. Buy helium-filled balloons in any color that works with your baby shower theme. Make sure each balloon has a long string attached to it. The string is where the magic happens. Glue greenery to the string where it meets the balloon. Directly below that, attach a flower (real or fake) with a dot of hot glue. Continue adding greenery and flower heads to the string until it is entirely covered and entirely beautiful.
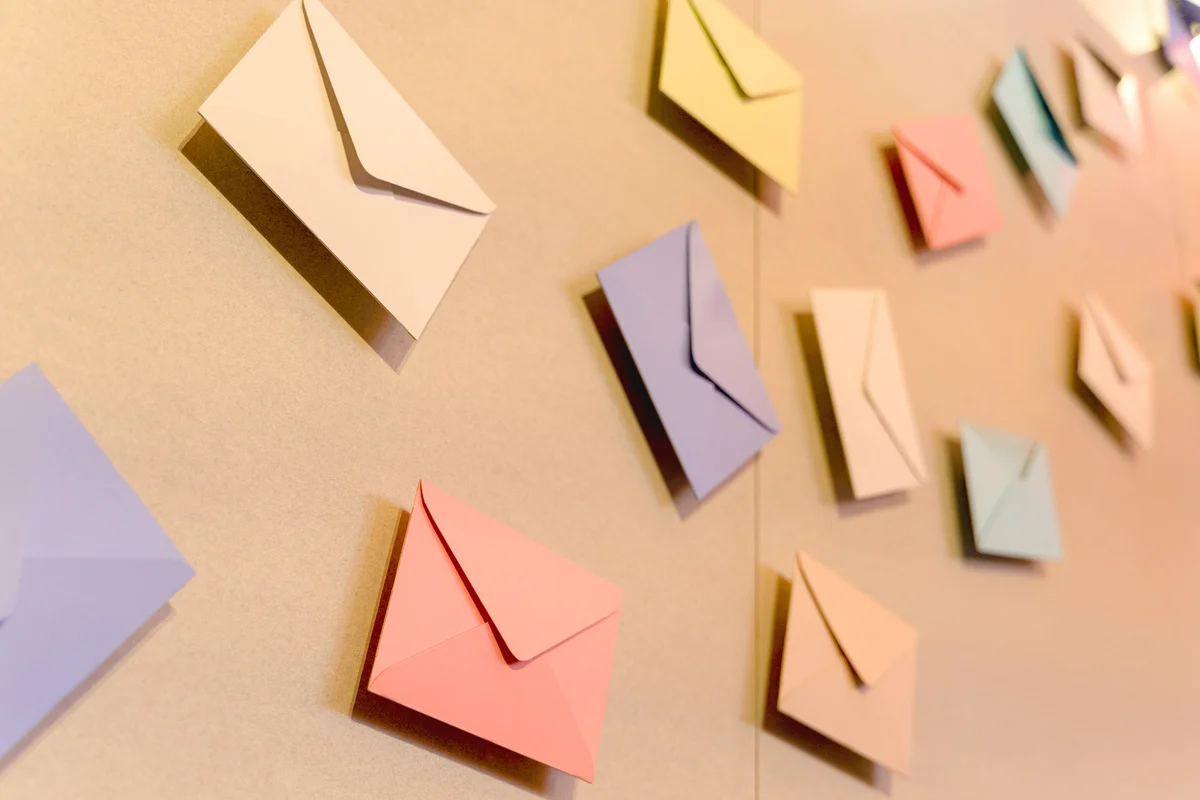
Wall of Wishes
Wishing the mother-to-be well and offering advice is a common thing for guests to do at baby showers. Take these words of wisdom and create a focal wall with them. Find a space in your shower venue that will serve as the wishes wall. Purchase scrapbook paper in all different prints and Sharpie pens. Have guests write short and useful tips and advice on the paper. Tape the pages to the wall to create an entire wall of wisdom for the mommy-to-be.
Another cute twist on this is to have everyone fill out a card with advice and place it in an envelope. Hang twine somewhere in the shower venue and attach each envelope containing the advice to the twine with a clothespin.
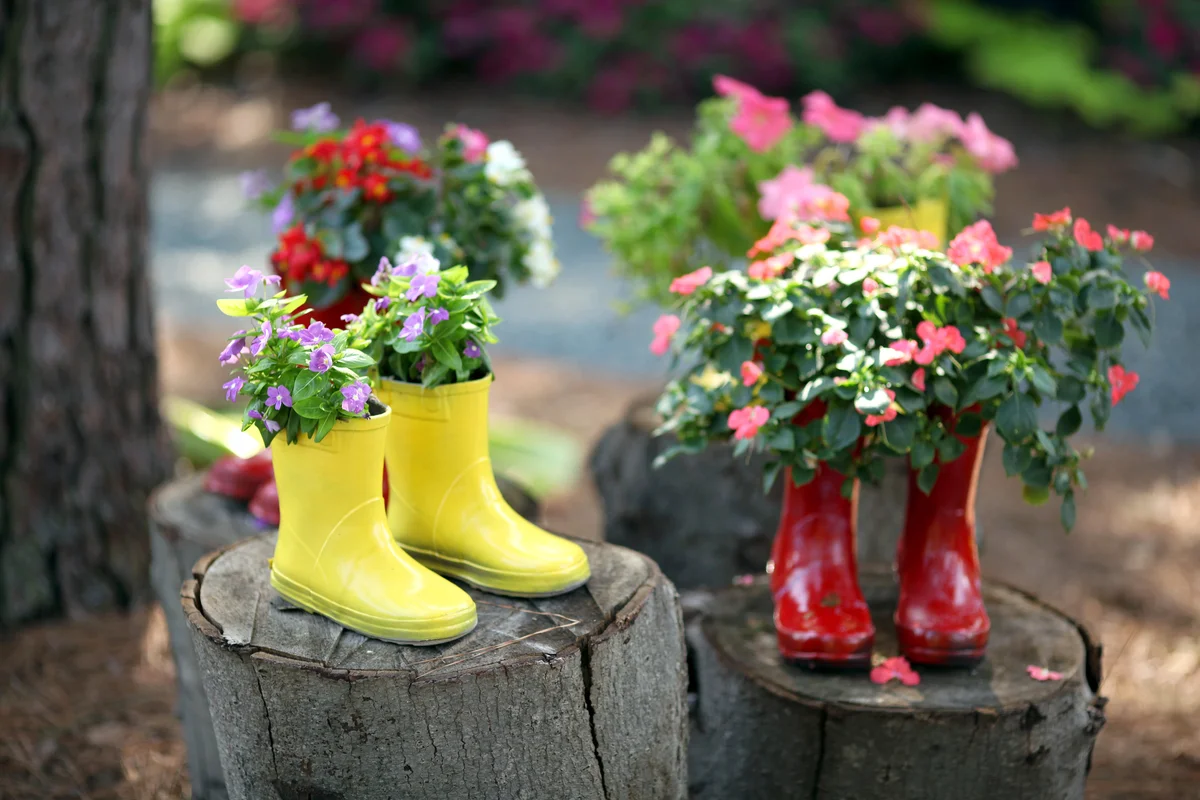
Boots of Beauty
Cute rain boots filled with flowers will be a perfect decorative addition to an April baby shower. All you need for this decorative element is a pair of clean rain boots and flowers. Set the rain boots aside a gift table or any space where you are drawing eyes to decorations and fill the boots with a few inches of water and some pretty flowers. Tall-stemmed flowers work best with this decoration, and nothing says spring like rain and tulips!
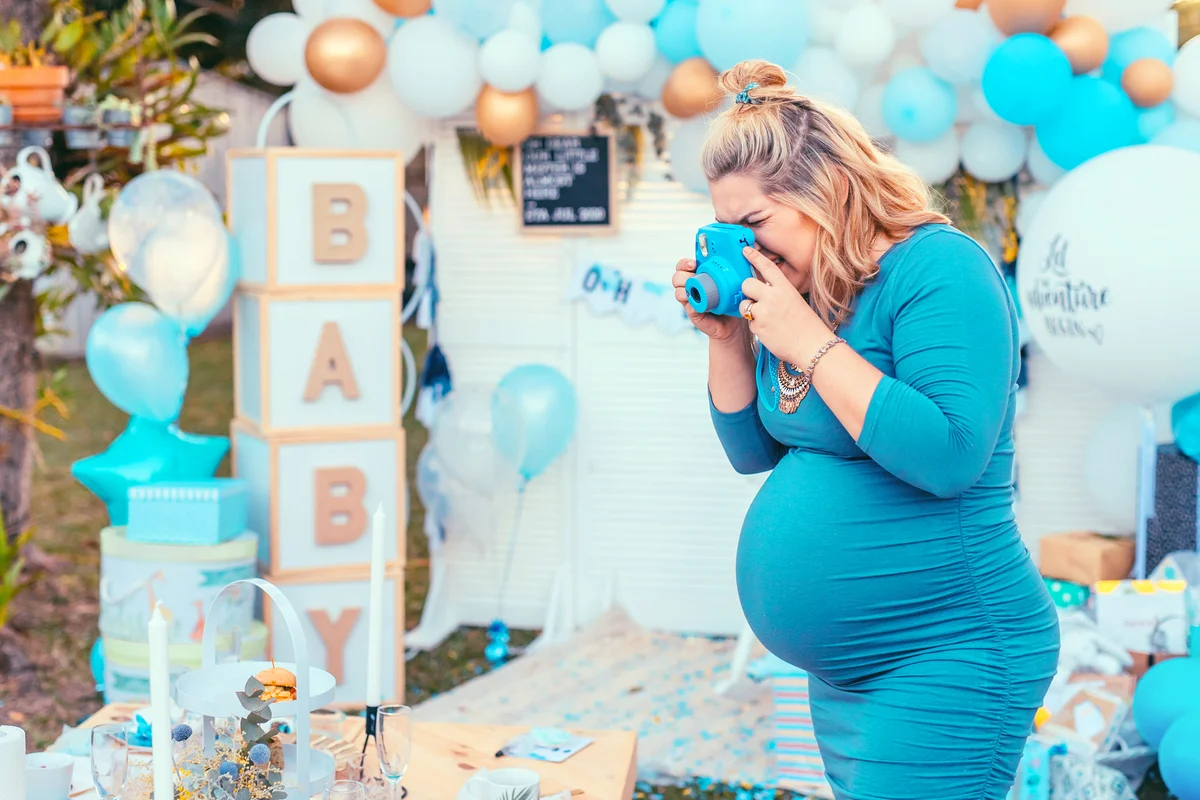
Stacked Baby Blocks
Play on classic baby blocks to pull this DIY decoration off. You will need:
- 4 boxes all the same shape and size
- Brown paper or baby inspired wrapping paper to cover the boxes
- Tape
- Cut out cardboard letters for the word: BABY
To make giant baby blocks that will fit perfectly in any room's corner, you will need to:
- Cover the four boxes in brown paper or chosen wrapping paper.
- Cut out the letters: B, A, B, and Y from card stock or cardboard.
- Glue one letter to each box.
- Stack the boxes to read: "BABY" from the top box to the bottom box.
Cheap and Unique Homemade Baby Shower Decorations
All of these decorations are reasonably easy to make, and most are very inexpensive. With customized, homemade decorations you have the opportunity to create something unique, so don't be afraid to add a creative spin to each project. After all, the uniqueness of these decorations is what makes them even more appealing than store-bought decorations, and the mom-to-be that you're honoring will surely appreciate the extra work that went into her baby shower.